
When prepping your home in Pleasanton for a fresh coat of paint, encountering rotted wood can be a common but challenging issue. This scenario presents homeowners with a critical decision: should the damaged wood be repaired with light carpentry work, or is replacement a more viable option? The integrity of your paint job—and the longevity of your home’s exterior—hinges on making the right choice.
In this article, we’ll explore the factors that should guide your decision on whether to repair or replace rotted wood, including the extent of the damage, cost implications, and long-term considerations. By understanding these elements, homeowners in Tracy can ensure their painting project is aesthetically pleasing and durable.
Understanding Wood Rot
Wood rot is a common problem in many homes in Sunol, particularly in areas exposed to moisture. Understanding what causes wood rot and how to identify it is essential for maintaining your home’s structural integrity and appearance.
What Causes Wood Rot?
Wood rot occurs when wood becomes too moist, creating an ideal environment for fungi to grow. These fungi feed on the cellulose and lignin in the wood, which are components that give wood its strength and stability. Typically, wood rot begins when the moisture content of the wood rises above 20%, which can happen due to improper sealing, lack of maintenance, exposure to the elements, or issues like leaky pipes or roofing.
How to Identify Wood Rot
Identifying wood rot involves looking for certain visual and physical changes in the wood:
- Softness: Pressing a screwdriver into the wood can help determine its integrity. If the tool sinks in easily, it’s a sign of rot.
- Discoloration: Wood with rot often shows signs of discoloration, ranging from a whitish, yellowish, or purplish tint to darker browns and blacks.
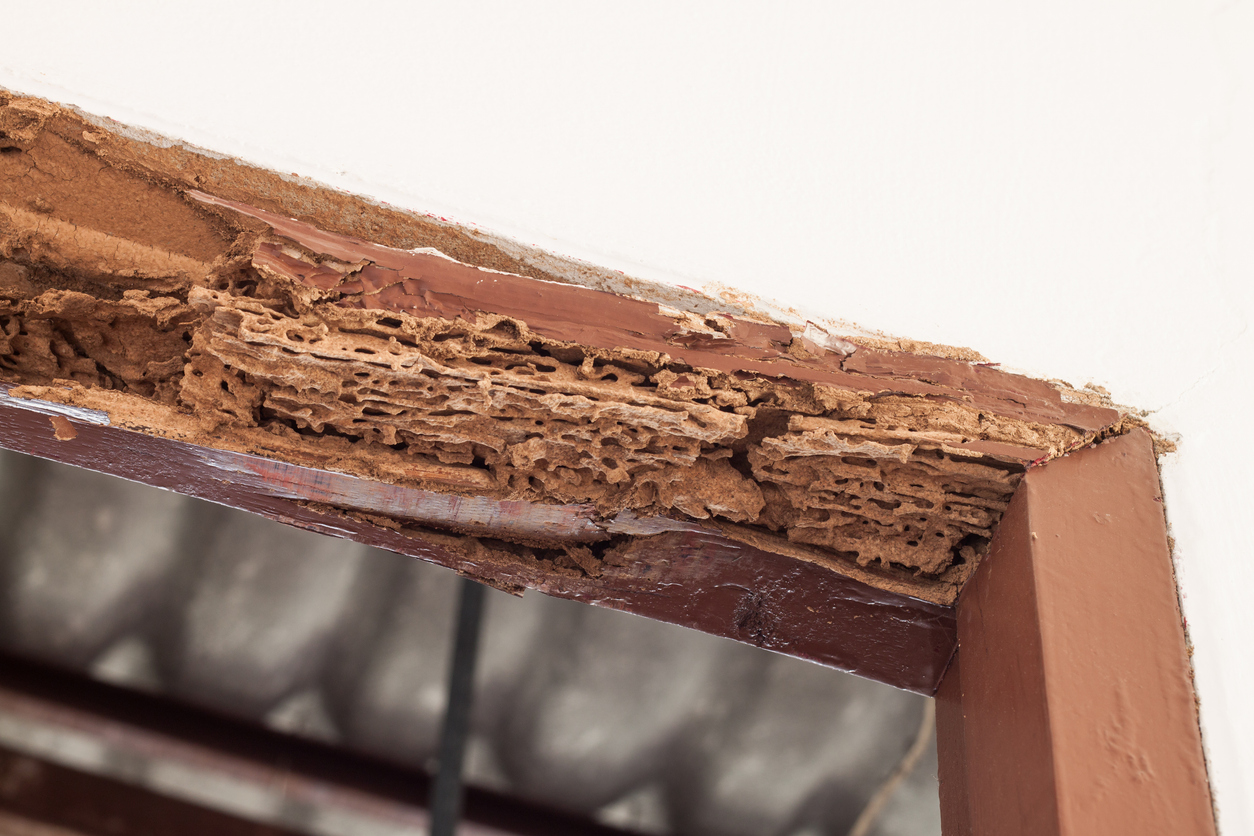
- Texture Changes: Rotted wood may appear spongy, stringy, or webbed with cracks. It can also crumble easily when poked.
- Fungal Growth: Look for signs of fungal growth, which can appear as a white or grey woolly coating on the wood’s surface.
Differences Between Dry Rot and Wet Rot
Understanding the differences between dry rot and wet rot is crucial for deciding whether to repair or replace the affected wood.
- Dry Rot: Despite its name, dry rot requires moisture to begin decaying wood but can spread into drier areas, making it more destructive. It often forms extensive networks of fungal strands that penetrate deep into the wood and even into other materials like masonry. Dry rot typically necessitates the replacement of affected wood because it extensively compromises structural integrity.
- Wet Rot: This type of rot stays confined to wetter areas and spreads less aggressively than dry rot. Wet rot causes the wood to feel soft and spongy and leads to localized damage. Repair might be feasible if the affected area is small and the source of moisture can be effectively eliminated.
Implications for Repair or Replacement
The type of rot can significantly influence the decision to repair or replace the wood:
- Dry Rot: Given its aggressive nature and the extent of damage it typically causes, replacement is often the safer and more cost-effective option.
- Wet Rot: If the affected area is localized and the source of moisture can be controlled, repairing the damaged section might be possible, especially if the rest of the wood remains structurally sound.
In both cases, addressing the source of moisture is critical to prevent future rot occurrences. Whether you choose to repair or replace, ensuring the wood is properly treated and protected will extend the life of your paint job and the overall health of your home.
Assessing the Extent of Damage
Before deciding whether to repair or replace rotted wood, it is essential to accurately assess the damage’s extent. Understanding the severity can help homeowners in Dublin make informed decisions that ensure safety and cost-effectiveness.
Guidelines for Evaluating the Severity of Wood Rot
To determine the feasibility of repair, consider the following guidelines:
- Structural vs. Non-Structural: Determine whether the rotted wood is part of a structural component (like beams or joists) or a non-structural element (like trim or decorative features). Structural components compromised by rot typically require replacement to maintain the safety and integrity of the building.
- Extent of the Damage: Check how deeply the rot has penetrated the wood. Surface rot that affects only a small portion of the wood might be repairable. However, if the rot has compromised the wood deeply, affecting more than just the surface, replacement is likely necessary.
- Area Coverage: Assess how much of the wood is affected. If rot is widespread and covers a large area or multiple sections of wood, replacement is usually the most effective solution. Smaller, localized areas might be candidates for repair.
- Stability: Test the wood’s stability. If it still maintains some structural integrity and stiffness, treating and filling the rotted areas might be possible. Completely soft, crumbly wood that lacks any structural integrity will need to be replaced.
Tips on When to Consult a Professional for an Assessment
While homeowners can perform initial assessments themselves, there are situations where consulting a professional is advisable:
- Uncertainty About the Extent of Damage: If it’s difficult to determine how deep or widespread the rot is, a professional can thoroughly examine it using tools and expertise beyond visual inspection.
- Structural Concerns: If rot is found in structural components, it is crucial to consult a professional to ensure that any repairs or replacements will meet safety standards and building codes.
- Complex Repairs: If the repair process involves complex reconstruction or integrating new materials with old ones, a professional can ensure the work is done correctly to prevent future problems.
- Historic Preservation: When a building has historical value, professionals can provide solutions that preserve the integrity and aesthetics of the original materials.
- Recurrent Issues: If wood rot continues to reappear despite previous repairs, a professional can help identify underlying issues that may not be apparent, such as hidden water leaks or inadequate ventilation.
Bringing in a professional helps accurately assess the damage and implement the most effective solutions, thereby extending the life of your home in San Ramon and ensuring the durability of the repair or replacement work.
Options for Repairing Rotted Wood
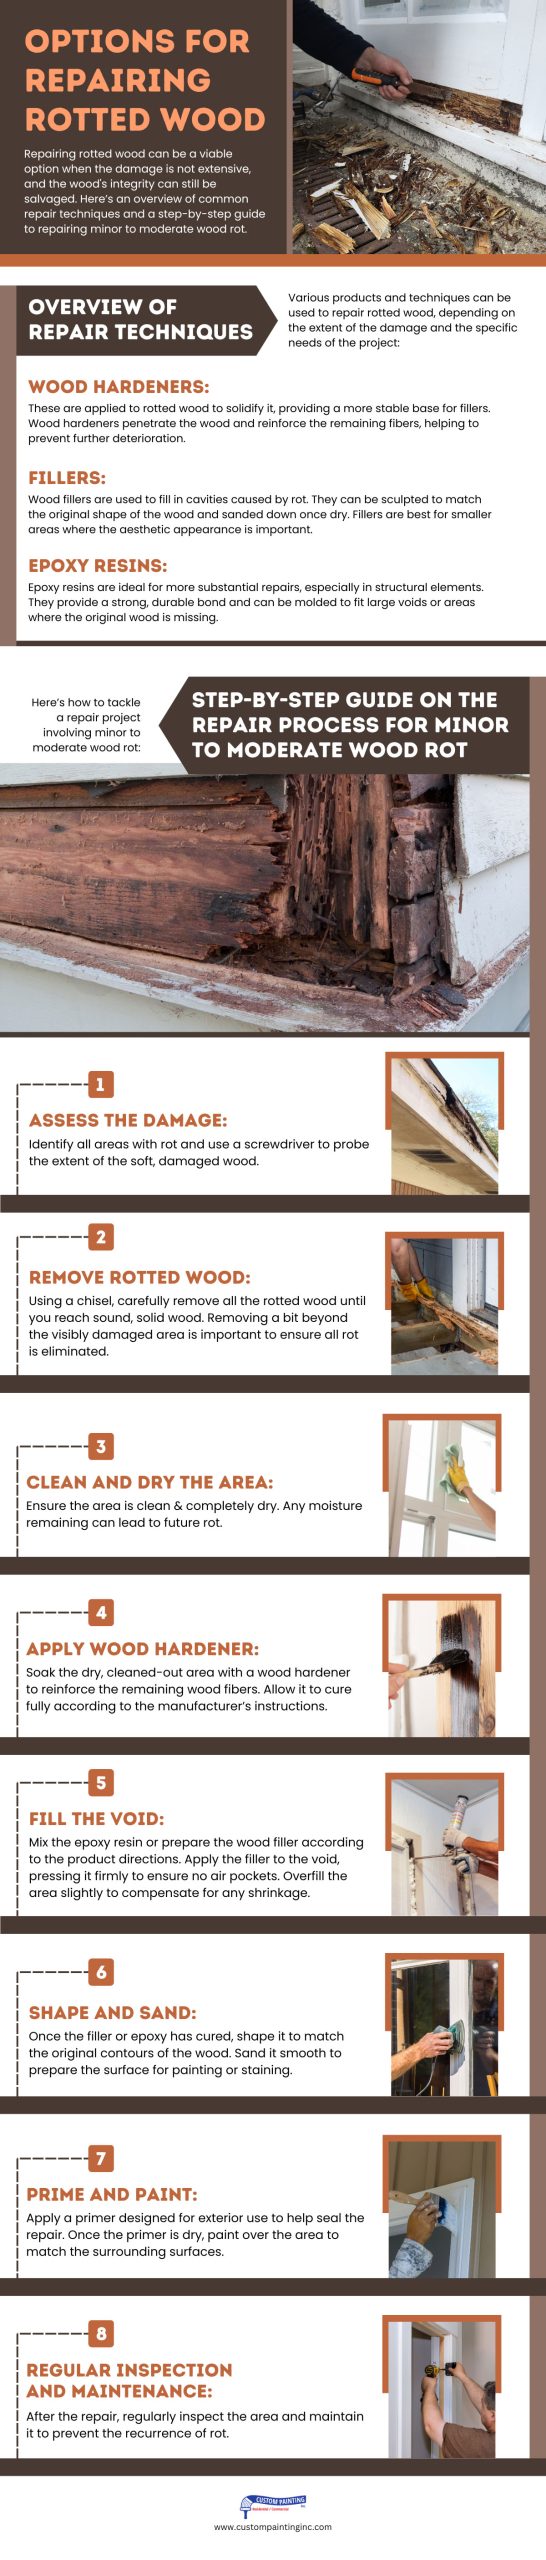
Repairing rotted wood can be a viable option when the damage is not extensive, and the wood’s integrity can still be salvaged. Here’s an overview of common repair techniques and a step-by-step guide to repairing minor to moderate wood rot.
Overview of Repair Techniques
Various products and techniques can be used to repair rotted wood, depending on the extent of the damage and the specific needs of the project:
- Wood Hardeners: These are applied to rotted wood to solidify it, providing a more stable base for fillers. Wood hardeners penetrate the wood and reinforce the remaining fibers, helping to prevent further deterioration.
- Fillers: Wood fillers are used to fill in cavities caused by rot. They can be sculpted to match the original shape of the wood and sanded down once dry. Fillers are best for smaller areas where the aesthetic appearance is important.
- Epoxy Resins: Epoxy resins are ideal for more substantial repairs, especially in structural elements. They provide a strong, durable bond and can be molded to fit large voids or areas where the original wood is missing.
Step-by-Step Guide on the Repair Process for Minor to Moderate Wood Rot
Here’s how to tackle a repair project involving minor to moderate wood rot:
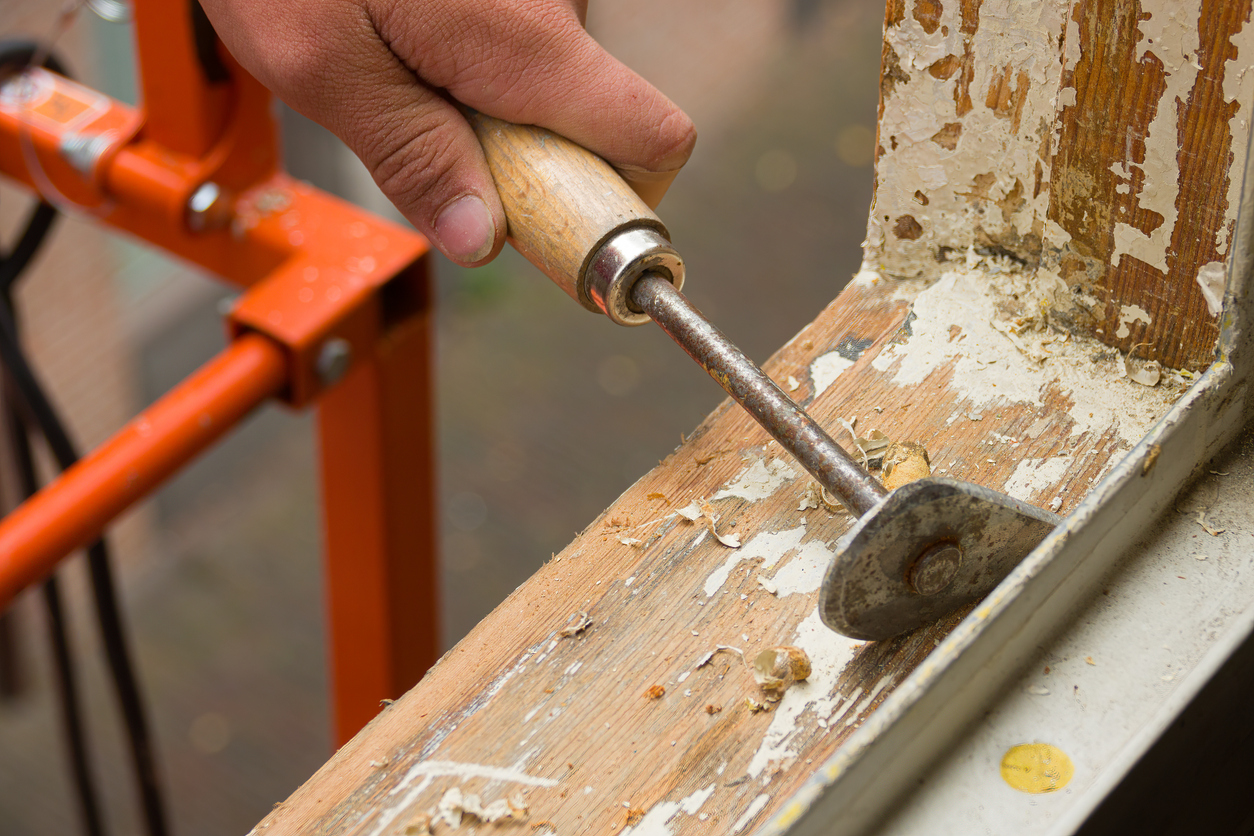
- Assess the Damage: Identify all areas with rot and use a screwdriver to probe the extent of the soft, damaged wood.
- Remove Rotted Wood: Using a chisel, carefully remove all the rotted wood until you reach sound, solid wood. Removing a bit beyond the visibly damaged area is important to ensure all rot is eliminated.
- Clean and Dry the Area: Ensure the area is clean and completely dry. Any moisture remaining can lead to future rot.
- Apply Wood Hardener: Soak the dry, cleaned-out area with a wood hardener to reinforce the remaining wood fibers. Allow it to cure fully according to the manufacturer’s instructions.
- Fill the Void: Mix the epoxy resin or prepare the wood filler according to the product directions. Apply the filler to the void, pressing it firmly to ensure no air pockets. Overfill the area slightly to compensate for any shrinkage.
- Shape and Sand: Once the filler or epoxy has cured, shape it to match the original contours of the wood. Sand it smooth to prepare the surface for painting or staining.
- Prime and Paint: Apply a primer designed for exterior use to help seal the repair. Once the primer is dry, paint over the area to match the surrounding surfaces.
- Regular Inspection and Maintenance: After the repair, regularly inspect the area and maintain it to prevent the recurrence of rot.
This process restores the wood’s appearance, functionality, and strength, making it a cost-effective alternative to replacing non-structural elements. However, it is advisable to consult a professional to ensure safety and compliance with local building codes for structural repairs.
When to Replace Instead of Repair
Deciding whether to replace rotted wood rather than attempting a repair is crucial for maintaining your property’s safety, integrity, and aesthetics. While repairs can be effective for minor to moderate damage, there are certain situations where replacement is the better option.
Criteria for Deciding to Replace Rotted Wood
The decision to replace rotted wood should be based on several key criteria:
- The extent of Damage: If the damage is extensive and the rot has penetrated deeply into the wood, compromising more than just the surface, replacement is often necessary. This is particularly true for structural components where the strength and stability of the wood are vital.
- Structural Significance: Any rot found in structural elements such as beams, joists, or load-bearing walls almost always necessitates replacement to ensure the safety and structural integrity of the building.
- Cost-Effectiveness: Sometimes, repairing a severely damaged piece of wood can approach or even exceed the cost of replacing it. In such cases, replacement may be more cost-effective, especially considering the longer lifespan and reduced maintenance costs of new materials.
- Recurrent Rot: If a particular area has been repaired previously but continues to deteriorate, this suggests an ongoing problem that further repairs may not resolve. Replacement may be necessary to fully address the underlying issues, such as persistent moisture problems.
Long-Term Benefits of Replacement in Cases of Extensive Damage
Replacing rotted wood, especially in cases of extensive damage, offers several long-term benefits:
- Increased Durability: New materials can be treated to resist moisture and rot, providing a longer-lasting solution than repairing older, already compromised wood.
- Enhanced Safety: Replacement eliminates the risk associated with weakened structural components, ensuring the building remains safe for occupants.
- Improved Aesthetics: New wood can be matched more closely to existing structures in terms of style and appearance, improving the property’s overall look.
- Higher Property Value: A well-maintained property with new materials can have a higher market value. Replacement can also be a selling point, indicating to potential buyers that the property has been kept up-to-date and cared for properly.
- Peace of Mind: Replacing damaged wood removes the uncertainty and recurring maintenance issues associated with repaired rot, providing Livermore homeowners peace of mind.
While the initial expense and effort of replacing rotted wood may be greater than repairing it, the long-term benefits often justify the investment. It ensures that your home or building remains sturdy, attractive, and safe for years to come, ultimately saving money and effort by reducing the need for frequent repairs.
Preparing for Painting After Repair or Replacement

Properly preparing newly repaired or replaced wood surfaces is crucial for achieving a durable and visually pleasing paint finish. Following best practices in preparation can greatly enhance the paint’s protective qualities and extend the wood’s lifespan. Here’s how to prepare and choose the right primers and paints.
Best Practices for Preparing Wood Surfaces for Painting
- Ensure Complete Dryness: Ensure that the new or repaired wood is completely dry before painting. Moisture in wood can cause paint to peel and lead to future rot issues.
- Sand the Surface: Sand the wood surface. Start with coarser grit sandpaper and gradually move to finer grit. This not only smooths out any roughness or unevenness but also improves the adhesion of the primer and paint.
- Clean Thoroughly: Remove all sanding dust, dirt, and debris from the wood surface. Use a tack cloth or a damp rag to wipe down the surface. Ensure that it is completely clean and free of any particles.
- Apply Primer: Choose a high-quality primer appropriate for the wood type and the environmental conditions it will face. Primer is an essential layer that improves paint adhesion, increases paint durability, and provides extra protection against elements.
Recommendations for Primers and Paints
Selecting the right primers and paints is key to protecting wood from future rot and ensuring long-lasting results:
Primer Choices:
- Oil-Based Primers: These are highly effective for wood surfaces because they penetrate deeply, helping to seal the porous material and providing a strong base for top coats.
- Acrylic Latex Primers: This primer is easier to clean up and emits fewer odors. They offer excellent flexibility and resistance to cracking, which can accommodate wood’s natural expansion and contraction.
Paint Choices:
- High-Quality Acrylic Latex Paints: These paints are durable and resist weathering well. They are flexible, which minimizes cracking and peeling by allowing the paint to move with the wood during temperature changes.
- Exterior-Grade Paints: If the wood is outdoors, ensure that the paint is rated for exterior use. These paints are formulated to withstand UV light and weather conditions, providing better protection against the elements.
Specific Features to Look For:
- Mildew and Mold Resistance: Choose paints and primers that resist mold and mildew, which can protect the wood in damp or humid environments.
- UV Protection: For areas exposed to significant sunlight, look for paints with UV protectants to prevent fading and degradation over time.
Final Preparation Tips
- Patch and Caulk: Before priming, fill any gaps, seams, or holes with a paintable exterior-grade caulk. This prevents water intrusion and ensures a smooth finish.
- Check Weather Conditions: Paint under suitable weather conditions — typically dry weather with moderate temperatures — to ensure the best paint application and curing.
By thoroughly preparing wood surfaces and choosing the right primer and paint products, you can significantly enhance the aesthetic appeal of your paint job while fortifying the wood against future damage. This meticulous approach to painting saves time and resources in the long run and maintains the integrity and beauty of your property.
Preventing Future Wood Rot
Preventing wood rot is crucial for maintaining the structural integrity and appearance of wood in your home. By implementing effective installation, maintenance, and moisture control strategies and conducting regular inspections, you can significantly reduce the risk of wood rot. Here’s how to approach each aspect.
Strategies for Preventing Wood Rot
- Proper Installation:
- Use Treated Wood: For areas exposed to moisture, such as outdoor decks or bathroom floors, use wood that has been pressure-treated to resist rot and pests.
- Elevate Wood from Direct Contact with Soil: Wood that touches the soil is more susceptible to moisture and decay. Where possible, use concrete bases or metal stands to elevate wooden structures.
- Ensure Good Air Circulation: Proper ventilation helps keep wood dry. Design structures so that air can circulate freely around all wooden components to aid in moisture evaporation.
- Maintenance:
- Paint and Seal Regularly: Apply water-repellent finishes, sealants, or paints to protect wood from moisture. Regularly check for cracks or peeling in the finish, and reapply as necessary to maintain a protective barrier.
- Clean Regularly: Dirt and debris can trap moisture against the wood. Keep wooden surfaces clean, and remove leaves or debris that may accumulate, especially in joints and crevices.
- Moisture Control:
- Fix Leaks Promptly: Water leaks from plumbing or roofs can lead to concentrated areas of moisture, which promote rot. Fix leaks as soon as they are detected.
- Ensure Proper Drainage: Prevent water from pooling around wooden structures. Ensure the surrounding landscaping slopes away from wood installations to help direct water away from them.
- Use Dehumidifiers in Damp Areas: In naturally damp areas like basements or crawl spaces, use dehumidifiers to reduce ambient moisture levels.
Importance of Regular Inspections
- Early Detection: Regular inspections help catch signs of wood rot early before it becomes severe. This can involve checking known trouble spots for soft spots, discoloration, or fungal growth.
- Professional Assessments: Consider having a professional inspect your property every few years, especially for structural components. Professionals can spot potential problems you might miss and assess the effectiveness of your rot prevention strategies.
- After Events: After heavy rains, floods, or other water-related events, conduct thorough inspections to ensure that your moisture control systems are still functioning effectively and that no new water exposure issues have arisen.
Implementing these preventive measures and maintaining regular inspections can greatly reduce the likelihood of wood rot developing. This proactive approach not only preserves the life and beauty of your woodwork but also saves on costly repairs and replacements in the future. Avoiding moisture issues and addressing small problems before they escalate ensures a safer and more durable home environment.
Cost Considerations
When facing the challenge of rotted wood, homeowners must weigh the repair costs versus replacement. Both options have their financial implications, and the decision often hinges on factors like the damage’s extent, the affected structure’s importance, and long-term durability. Understanding these cost dynamics can help you make a more informed choice that fits your budget and protects your investment in your property over time.
Analysis of the Cost Implications of Repairing vs. Replacing Rotted Wood
Repair Costs:
- Materials: Repairing materials such as wood hardeners, fillers, or epoxies are generally less expensive than purchasing new lumber, especially if the damaged area is small.
- Labor: If you can perform the repair yourself, you can save on labor costs. However, professional repairs can be cost-effective for complex or extensive damage, particularly in structural areas, since experts can ensure the job is done right the first time.
- Time: Repairs can often be completed faster than full replacements, especially if the damage is localized. This can be crucial if time constraints are pressing, such as before bad weather periods.
Replacement Costs:
- Materials: New wood, especially if treated or of a specific type (like cedar or redwood), can be more expensive. However, new wood typically offers better longevity and less maintenance in the long run.
- Labor: Replacement often involves more extensive labor, especially if the rotted wood needs to be safely removed from existing structures. This can increase the overall cost.
- Disposal: Replacing old wood may also incur additional costs for the disposal of the rotted wood, which might require special handling depending on local regulations.
Investing in Prevention and Timely Repairs Can Save Money in the Long Run
- Preventive Measures: Investing in high-quality, treated wood and proper installation might have a higher upfront cost but can significantly reduce the occurrence of wood rot. Spending on periodic sealing, painting, or staining to protect wood from moisture incurs some expense but is far less than replacing rotted structures.
- Timely Repairs: Addressing rot early, when damage is minor, can keep repair costs low. Delaying repairs can lead to more extensive damage and higher costs. Timely repairs can prevent rot from spreading to adjacent wood, drastically reducing the potential for more extensive and costly replacements.
- Long-Term Savings: Properly maintained and promptly repaired wood structures last longer, postponing the need for costly replacements. Well-maintained properties retain higher resale values. Avoiding structural issues like widespread wood rot can make a significant difference in marketability and price.
By carefully weighing these factors, homeowners can decide whether repairing or replacing is the most cost-effective solution for their situation.
Conclusion
Deciding between repairing and replacing rotted wood requires careful consideration of the extent of damage, cost implications, and long-term benefits. Whether you choose to repair minor damage or replace extensively rotted sections, prioritizing early detection and regular maintenance can significantly reduce long-term costs and preserve the integrity of your home.
For expert advice and professional service, contact Custom Painting, Inc. at 925-294-8062 or use our contact form to discuss your specific needs and get quality assistance with your project.