
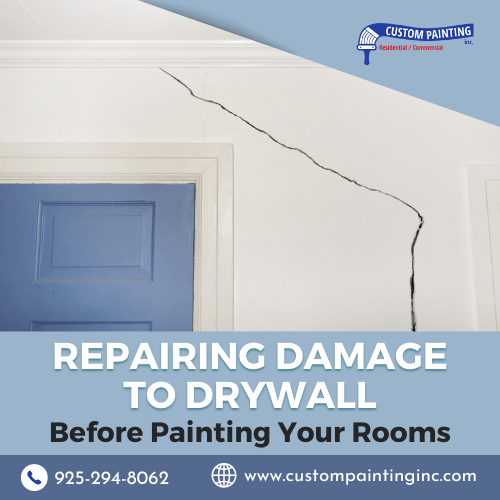
Before you start painting your Pleasanton, CA home, it’s crucial to repair any damage to the drywall. Cracks, holes, and dents can ruin the smooth finish you’re aiming for and make even the best paint job look unprofessional. In this article, we’ll guide you through simple steps to fix these imperfections, ensuring your walls are in top shape before you pick up that paintbrush.
Whether you’re dealing with minor dings or more significant damage, a little preparation will go a long way in achieving a flawless, long-lasting result.
Assessing Drywall Damage
Before diving into repairs, it’s essential to assess the extent of the damage to your drywall. Proper evaluation will help you determine the right approach and materials needed for the job.
Steps to Evaluate the Extent of the Damage
- Inspect the Walls: Start by carefully inspecting the entire wall surface. Look for visible signs of damage, such as cracks, holes, dents, or any areas where the drywall may be bulging or sagging.
- Test for Stability: Lightly press around the damaged areas to check for stability. If the drywall feels soft or gives way, the damage may be more severe and could require reinforcement or additional repair materials.
- Measure the Damage: For larger holes or cracks, measure the size of the damaged area. This will help you determine whether a simple patch will suffice or if you’ll need to replace a section of the drywall.
- Examine the Surrounding Area: Check for any signs of water damage, mold, or other issues that may have caused or worsened the drywall damage. Addressing these underlying problems is crucial before beginning any repairs.
Identifying Types of Damage
Not all drywall damage is the same, and different types require different repair techniques. Here’s a breakdown of the most common types of drywall damage:
- Small Holes: These are typically caused by nails, screws, or small accidental impacts. Small holes are usually less than half an inch in diameter and are easy to repair with a bit of spackle or a patch kit.
- Cracks: Drywall cracks can occur due to the house settling, temperature changes, or minor structural shifts. They often appear around windows, doors, or in corners. Small cracks can be fixed with joint compound, but larger or recurring cracks may indicate a more serious issue.
- Dents: Dents are often caused by furniture bumps, doorknobs, or other objects hitting the wall. They can vary in size but are generally shallow and easy to fill with spackle.
- Large Holes: Large holes, typically over two inches in diameter, may be caused by accidents or the removal of wall fixtures. These require a more extensive repair process, often involving cutting out the damaged section and replacing it with new drywall.
Tools and Materials Needed
Having the right tools and materials is key to successfully repairing drywall. With the proper equipment, the process becomes more straightforward, and the results will be more durable and professional.
Essential Tools for Drywall Repair
- Utility Knife: A sharp utility knife is crucial for cutting drywall, trimming paper edges, and removing loose material around the damaged area.
- Putty Knife: A putty knife is used to apply spackle or joint compound smoothly. It’s helpful to have a few different sizes, ranging from 2 inches to 6 inches, for various repair needs.
- Drywall Saw: For cutting out larger damaged sections, a drywall saw is necessary. It allows for precise cuts and easy handling when working with drywall.
- Sanding Block or Sandpaper: After applying joint compound or spackle, you’ll need to sand the area smoothly. A sanding block or fine-grit sandpaper (120- to 220-grit) will help achieve a seamless finish.
- Tape Measure: Accurate measurements are important, especially when replacing larger sections of drywall. A tape measure ensures your cuts and patches are precise.
- Drywall Tape: Drywall tape is used to reinforce cracks and seams. Choose between paper tape for standard applications or fiberglass mesh tape for extra strength and ease of use.
- Dust Mask and Safety Goggles: Sanding and cutting drywall creates fine dust that can be harmful if inhaled. Wearing a dust mask and safety goggles will protect your lungs and eyes during the repair process.
- Screwdriver or Drill: For securing patches or replacement drywall sections, a screwdriver or drill with drywall screws is necessary.
Essential Materials for Drywall Repair
- Joint Compound (Drywall Mud): A joint compound is essential for filling cracks, smoothing over tape, and creating a uniform surface. For best results, use a lightweight, all-purpose joint compound that’s easy to work with and sands smoothly.
- Spackle: For smaller holes and dents, spackle is ideal. It dries quickly and is easy to sand, making it perfect for quick touch-ups.
- Drywall Patches: Self-adhesive drywall patches are convenient for covering small to medium-sized holes. They create a stable surface for applying joint compounds.
- Replacement Drywall: If you’re dealing with large holes or damaged sections, you’ll need a piece of replacement drywall. Make sure to match the thickness of the existing wall for a seamless repair.
- Primer: After the repair is complete and the area is sanded smooth, applying a coat of primer ensures the paint adheres properly and covers the repair effectively.
Recommendations for Quality Products
- Joint Compound: Consider using USG Sheetrock All-Purpose Joint Compound for its ease of use and smooth finish. It’s a trusted brand in drywall repair.
- Spackle: DAP DryDex Spackling is an excellent choice for its color-changing feature, which lets you know when it’s dry and ready to sand.
- Drywall Tape: FibaTape Perfect Finish self-adhesive mesh tape is strong and easy to apply, helping to prevent future cracks.
- Drywall Patches: 3M High Strength Large Hole Repair Kit comes with everything you need for patching holes up to 5 inches in diameter, making it a reliable option for medium-sized repairs.
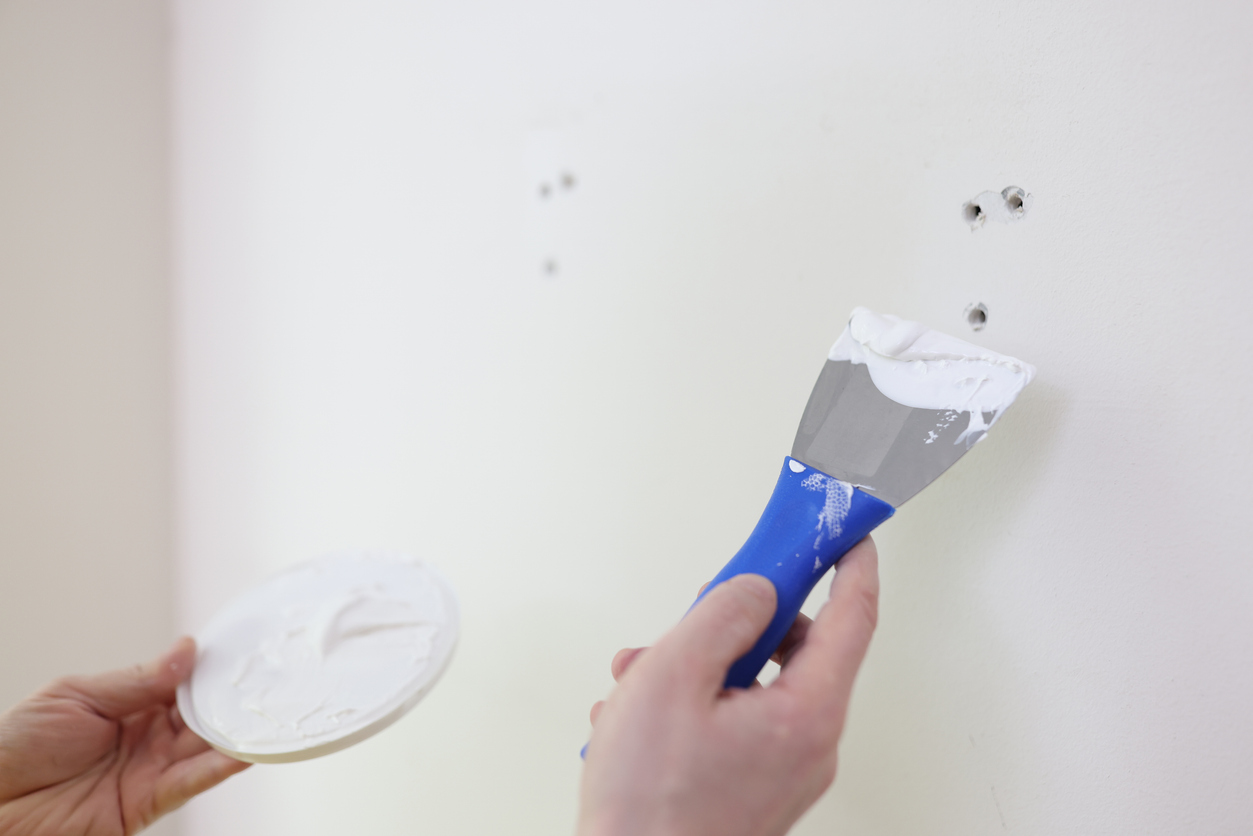
Repairing Small Holes and Dents
Small holes and dents in your drywall can be unsightly, but they are also some of the easiest types of damage to repair. With the right approach and materials, you can restore your walls to a smooth, even finish, ready for painting.
Step-by-Step Guide to Filling Small Holes and Dents
- Clean the Area: Start by cleaning the damaged area to remove any dust, dirt, or loose debris. You can use a damp cloth to wipe the surface clean and let it dry completely before proceeding.
- Prepare the Surface: For small holes, use the edge of a utility knife to scrape away any loose drywall or paint around the hole. This will create a smooth edge for the repair. If you’re working on a dent, gently sand the area to ensure there are no raised edges.
- Apply Spackle or Joint Compound:
- For Small Holes: Use a putty knife to scoop a small amount of spackle or joint compound onto the blade. Press it into the hole, slightly overfilling it to ensure the hole is completely covered. Smooth the excess material with the putty knife, holding the blade at a slight angle to the wall.
- For Dents: Apply a thin layer of spackle or joint compound over the dent, filling the indentation and smoothing the material out to blend with the surrounding wall. Again, slightly overfill the area to allow for sanding later.
- Let It Dry: Allow the spackle or joint compound to dry completely. Drying times can vary depending on the product and the thickness of the application, but it typically takes a few hours. Check the product label for specific drying time recommendations.
- Sand the Surface: Once the repair is fully dry, use fine-grit sandpaper (120- to 220-grit) or a sanding block to sand the patched area. Sand until the surface is smooth and flush with the surrounding wall. Be careful not to oversand, as this can create a depression in the wall.
- Inspect and Reapply if Necessary: After sanding, inspect the repair. If you notice any uneven areas or if the hole or dent is still visible, apply a second thin layer of spackle or joint compound. Let it dry and sand again until the surface is perfectly smooth.
- Prime the Area: Before painting, apply a coat of primer to the repaired area. This step is essential, as it helps the paint adhere evenly and prevents the repaired spot from showing through the final paint finish.
Tips for Using Spackle or Joint Compound
- Use the Right Amount: Avoid applying too much spackle or joint compound at once. It’s better to build up the repair in thin layers, which will dry faster and be easier to sand.
- Feather the Edges: When smoothing the spackle or joint compound, feathering the edges by gradually decreasing pressure as you move away from the repair. This helps blend the repair seamlessly into the surrounding wall.
- Keep Your Tools Clean: Clean your putty knife between applications to prevent dried spackle or joint compounds from creating lumps in your repair.
- Work in Good Lighting: Proper lighting will help you see any imperfections as you work, ensuring that you achieve a smooth and even surface.
Fixing Cracks in Drywall
Cracks in drywall can occur for various reasons, including the natural settling of your home, temperature fluctuations, or minor structural shifts. These are common problems in the Bay area including the cities of Livermore, Dublin, San Ramon, Fremont, Sunol, and Tracy. Addressing these cracks promptly is essential to maintaining the integrity and appearance of your walls.
Techniques for Repairing Hairline Cracks
- Widen the Crack Slightly: Hairline cracks are often too narrow for spackle or joint compound to adhere properly. Use the edge of a utility knife or a putty knife to widen the crack slightly, creating a small V-shaped groove along the crack. This provides a better surface for the repair material to bond.
- Clean the Area: Remove any loose debris or dust from the crack using a dry brush or a vacuum. A clean surface ensures better adhesion of the repair material.
- Apply Joint Compound or Spackle: Using a putty knife, apply a thin layer of joint compound or spackle over the crack, pressing it into the groove. Smooth the material over the crack, feathering the edges to blend it with the surrounding wall.
- Let It Dry and Sand Smooth: Allow the compound to dry completely, then sand the area with fine-grit sandpaper until it’s smooth and even with the wall. If needed, apply a second thin layer of compound, let it dry, and sand again.
- Prime and Paint: After the repair is smooth and flush with the wall, apply a coat of primer before repainting the area to ensure a consistent finish.
Techniques for Repairing Larger Cracks
- Widen and Clean the Crack: Similar to hairline cracks; larger cracks should be widened slightly using a utility knife to create a V-shaped groove. Clean out any loose debris or dust to prepare the surface for repair.
- Apply Drywall Tape: To reinforce larger cracks and prevent them from reopening, apply drywall tape over the crack. There are two types of tape commonly used:
- Paper Tape: Ideal for standard repairs, paper tape is strong and provides a smooth finish. Apply a thin layer of joint compound over the crack, then press the paper tape into the compound. Smooth out any air bubbles and excess compounds with a putty knife.
- Fiberglass Mesh Tape: Easier to work with for beginners, fiberglass mesh tape is self-adhesive and sticks directly to the wall. Place the tape over the crack and press it firmly into place.
- Apply Joint Compound Over the Tape: Once the tape is in place, apply a layer of joint compound over it, ensuring the compound covers the tape completely and extends a few inches beyond the tape’s edges. Feather the edges of the compound to blend it with the surrounding wall.
- Let It Dry and Apply Additional Layers: Allow the first layer of the compound to dry completely. Depending on the size of the crack, you may need to apply additional layers of joint compound, each time extending the compound further out from the crack and feathering the edges. Let each layer dry before applying the next.
- Sand Smooth and Prime: After the final layer of the compound has dried, sand the area until it’s smooth and even with the rest of the wall. Be sure to prime the repaired area before painting to ensure the paint adheres evenly and the repair is not visible.
Tips on Reinforcing Cracks with Drywall Tape
- Choose the Right Tape: For hairline cracks, paper tape is often sufficient, but for larger or recurring cracks, fiberglass mesh tape offers additional strength and durability.
- Embed the Tape Properly: When using paper tape, make sure to press it firmly into the joint compound and smooth out any air bubbles to avoid future issues with peeling or cracking.
- Overlap the Tape Slightly: If you’re working with a long crack, overlap the tape slightly at each end to ensure full coverage and reinforcement.
- Avoid Overloading with Compound: Apply joint compound in thin layers, allowing each to dry fully before adding more. This helps prevent cracking and ensures a smooth finish.
Patching Large Holes

Patching large holes in drywall can seem daunting, but with the right approach, it’s a manageable task that can restore your wall to its original condition. Whether the damage was caused by an accident or the removal of a fixture, replacing the damaged section with a new piece of drywall is the best solution.
Instructions for Cutting Out and Replacing Damaged Drywall Sections
- Mark the Area to Be Removed: Use a pencil and a straightedge to mark a square or rectangular outline around the damaged area. Make sure the outline extends slightly beyond the damage into the intact drywall. This makes it easier to cut out a clean section and ensures the patch will have a stable surface to adhere to.
- Cut Out the Damaged Section: Using a drywall saw or a utility knife, carefully cut along the lines you marked. Remove the damaged piece of drywall, being cautious not to damage any electrical wires or plumbing behind the wall. If the hole is near a stud, try to expose the stud so that the patch can be secured directly to it.
- Prepare the Replacement Patch: Measure the dimensions of the hole you just cut out, and transfer these measurements to a new piece of drywall. Cut the new piece to size, ensuring it fits snugly into the hole. For added stability, consider using a piece of drywall that matches the thickness of your existing wall.
- Install Support if Needed: For holes that don’t span across a stud, you’ll need to install support behind the patch. You can use a small piece of wood, like a furring strip, placed horizontally behind the hole. Insert the wood through the hole, secure it with drywall screws through the existing drywall, and leave part of the wood exposed to screw the patch onto.
- Secure the Patch: Place the drywall patch into the hole and secure it with drywall screws, screwing into the studs or the wooden support. Make sure the patch is flush with the surrounding wall. If the patch sits deeper than the wall surface, it will be difficult to blend later on.
Tips on Securing Patches and Blending Them Seamlessly with the Surrounding Wall
- Apply Drywall Tape Over the Seams: To reinforce the patch and prevent cracks from forming, apply drywall tape over the seams where the patch meets the existing wall. Use paper tape or fiberglass mesh tape, depending on your preference. Be sure to press the tape firmly into the joint compound and smooth it out to eliminate any air bubbles.
- Apply Joint Compound: Spread a layer of joint compound over the taped seams, using a wide putty knife to feather the edges and blend the compound with the surrounding wall. The first layer should cover the tape completely. Let the compound dry thoroughly before applying additional layers.
- Build Up Layers Gradually: For a seamless finish, apply two to three thin layers of joint compound, each time extending the compound slightly beyond the previous layer. This gradual buildup helps to blend the patch with the surrounding wall without creating noticeable ridges.
- Sand Smooth: After the final layer of joint compound has dried, sand the patched area with fine-grit sandpaper (120- to 220-grit) until it is smooth and flush with the wall. Be careful not to oversand, as this can expose the tape or create indentations.
- Prime and Paint: Before painting, apply a coat of primer over the patched area. Primer helps to seal the joint compound and ensures that the paint adheres evenly. Once the primer is dry, paint the patched area to match the rest of the wall, blending the edges carefully for a uniform appearance.
- Check for Imperfections: After painting, check the area using different lighting to ensure the patch is not visible. If you notice any imperfections, lightly sand and touch up the paint as needed.
Sanding and Smoothing the Surface
Sanding is a crucial step in the drywall repair process that can make the difference between a flawless finish and a wall that reveals every imperfection. Proper sanding ensures that the repaired areas blend seamlessly with the surrounding wall, creating a smooth surface that’s ready for priming and painting.
Importance of Sanding for a Flawless Finish
Sanding serves several essential purposes in the drywall repair process:
- Smooths Out Imperfections: After applying joint compound or spackle, there can be uneven areas, ridges, or excess material left on the wall. Sanding these areas smoothens out the surface, ensuring that the repaired section is flush with the rest of the wall.
- Blends Patches Seamlessly: Proper sanding helps blend the edges of the patched area with the surrounding drywall, making the repair virtually invisible. This is especially important when you’re dealing with large patches or repairs over seams.
- Prepares the Surface for Priming and Painting: A smooth surface is essential for paint to adhere evenly and cover the repaired area without revealing flaws. Sanding helps create a uniform texture that allows primer and paint to go on smoothly and consistently.
Tips on Selecting the Right Sandpaper and Achieving an Even Surface
1. Choose the Right Grit:
- Coarse Grit (60-80 grit): Use coarse sandpaper only if you need to remove significant excess material or level out a very uneven surface. However, be cautious with coarse grit as it can create deep scratches that require additional smoothing.
- Medium Grit (100-150 grit): This is ideal for most drywall sanding tasks. Medium grit is effective at smoothing joint compound or spackle while being gentle enough to avoid damaging the surrounding drywall.
- Fine Grit (180-220 grit): For finishing touches, fine grit sandpaper is best. It’s perfect for lightly sanding between layers of joint compound and for the final pass to achieve a perfectly smooth surface before priming.
2. Use a Sanding Block or Pole Sander:
To achieve an even surface, use a sanding block or pole sander, especially when working on larger areas. These tools help distribute pressure evenly, preventing the creation of dips or gouges in the drywall.
- Sand in Circular Motions: When sanding, use circular motions or long, even strokes to avoid creating lines or ridges. This technique helps blend the repair with the surrounding wall and ensures a smooth finish.
- Apply Light Pressure: Avoid pressing too hard while sanding. Applying light, consistent pressure allows you to gradually smooth the surface without damaging the drywall or removing too much material.
- Check Your Work Frequently: As you sand, frequently run your hand over the surface to feel for any uneven spots or imperfections. This tactile check can help you identify areas that need more attention before moving on.
- Work in Good Lighting: Proper lighting is essential for seeing the surface clearly as you sand. Bright, natural light or a work light angled across the wall can help highlight any areas that need further smoothing.
- Keep the Surface Clean: After sanding, wipe down the surface with a damp cloth or a tack cloth to remove dust. This step is crucial before priming, as dust particles can affect paint adhesion and leave a gritty texture on the wall.
Final Thoughts
Repairing drywall before painting is essential to achieving a smooth, professional finish. By following the steps outlined in this guide, you can ensure that your walls are in top condition and ready for a fresh coat of paint. If you’d like expert help with your drywall repairs or painting project, contact Custom Painting, Inc. to schedule a consultation. Give us a call at 925-294-8062, or use our contact form to get started.