

If you are reading this blog, you have finally decided to transform the heart of your Pleasanton home—the interiors! Painting is more than just adding color; it’s an art that breathes life into your walls, setting the tone for your space. From the initial color selection to the final strokes, this guide will help you. Let’s uncover the techniques and insights that will revitalize your living spaces with finesse and personal style.
Custom Painting, Inc. recently worked on a residence with 16 rooms, including bathrooms and closets. One remarkable change in this transformation was transitioning from the warm, natural hues of wood to a sleek, pristine white finish on the cabinets.
In this comprehensive guide, we’ll explore every aspect of painting your home’s interior and offer insight into the necessary steps when considering a professional painting contractor.
Understanding the Need for Repainting
Recognizing Signs of Wear: Over time, paint can wear down because of different factors, such as exposure to sunlight, moisture, or general wear and tear. Look for signs like chipping, fading, or peeling, indicating that your walls might benefit from a fresh coat.
Timeline for Repainting: The frequency of repainting varies based on various factors, including the type of paint used, environmental conditions, and daily wear. Typically, interior walls may require repainting every 5 to 7 years to maintain their vibrant appearance and protective layer.
Aesthetic Enhancement: Beyond maintenance, a fresh coat of paint can rejuvenate your living spaces, breathing new life and vitality into your home. It’s an opportunity to explore new color schemes or refresh existing ones for an updated look and feel.
Enhancing Property Value: Repainting the interiors uplifts the aesthetics and adds value to your San Ramon property. A well-maintained and freshly painted interior can also significantly impact potential buyers or renters.
Professional Assessment: Consider seeking advice from painting professionals to evaluate the condition of your walls and determine if repainting is necessary. Their expertise can give valuable insights into the best course of action for your specific space.
Preparing for Interior Painting
1. Clearing the Space
Begin by removing furniture, decorations, and any movable items from the room. Clearing the space allows easier access to walls and ensures belongings remain free of paint splatters.
2. Surface Preparation
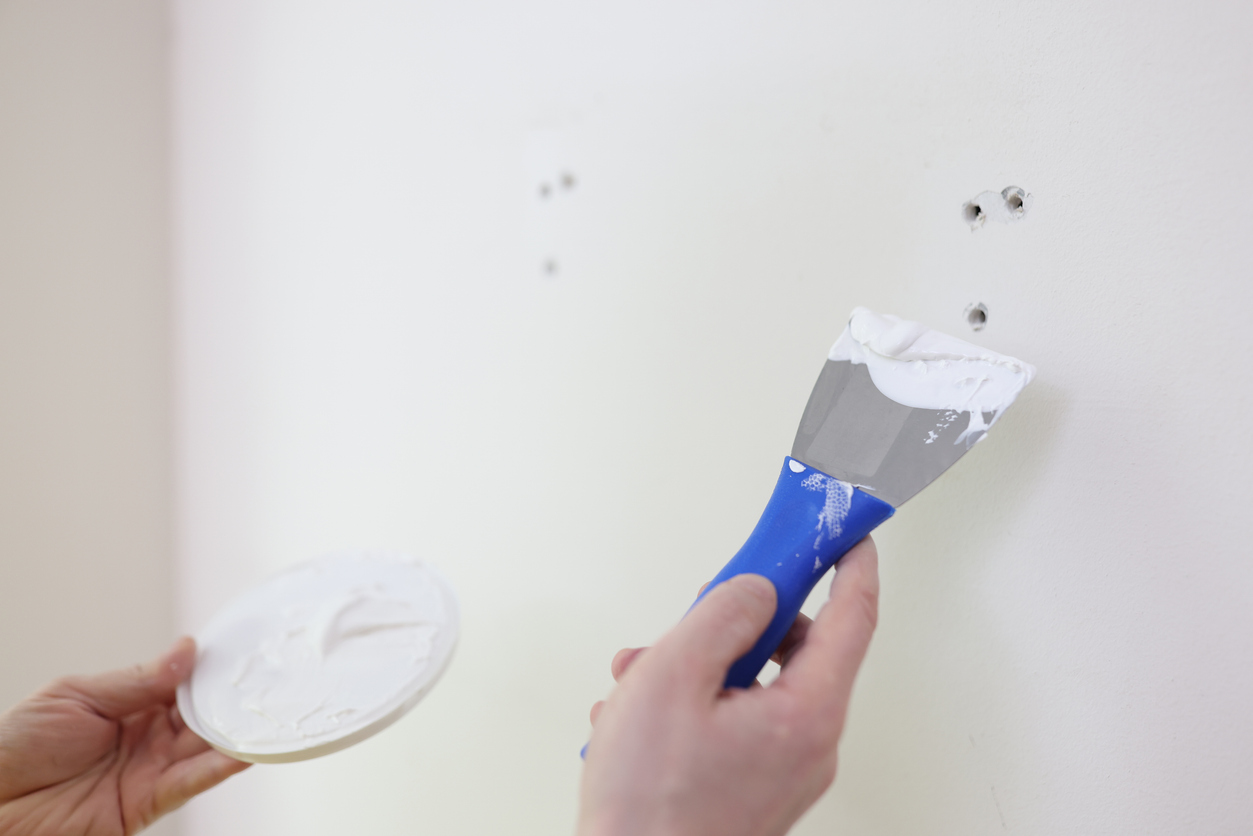
Clean the walls and ensure that they are free of dirt, dust, and grease that could hinder paint adhesion. Patch any holes, cracks, or imperfections in the walls with a spackling compound and sand them smooth once dry. This step creates a flawless surface for paint application.
3. Protecting Fixtures and Flooring
Cover fixtures, flooring, and immovable items with drop cloths or plastic sheets to shield them from paint drips or spills. Use painter’s tape to protect edges, trim, and areas that won’t be painted.
4. Choosing the Right Tools
Make sure that you have the important tools and materials, including paint brushes, rollers, trays, and extension poles. Select appropriate brushes and rollers based on the surface texture for an optimal finish.
5. Priming the Walls
Applying a coat of primer is important, especially for bare walls or when transitioning between different paint colors. Primer helps the paint stick well and gives a uniform base for the paint.
6. Ventilation and Safety
Maintain proper ventilation by opening windows or using fans to ensure adequate airflow during and after painting. Wear appropriate protective gear such as goggles, gloves, and a mask, especially when sanding or working with chemicals.
7. Planning the Sequence
Strategically plan the painting sequence, typically starting from the ceiling and then moving to walls and trim. This sequence minimizes drips and ensures a seamless finish.
8. Time Allocation
Allocate sufficient time for each step of the preparation process. Rushing through preparation can lead to unsatisfactory results.
The Painting Process
1. Preparation
Priming (if needed): Apply primer to the prepared surfaces. This step ensures better paint adhesion, especially on bare walls or repaired areas.
Mixing Paint: Thoroughly mix the paint to ensure consistent color and texture throughout the project.
Setting up Equipment: Prepare paint trays, brushes, rollers, and other necessary tools. Use drop cloths to protect the floor.
2. Cutting In
Start by “cutting in” or outlining the edges and corners of walls and ceilings with a brush. This technique ensures clean lines and precision in areas where rollers might not reach.
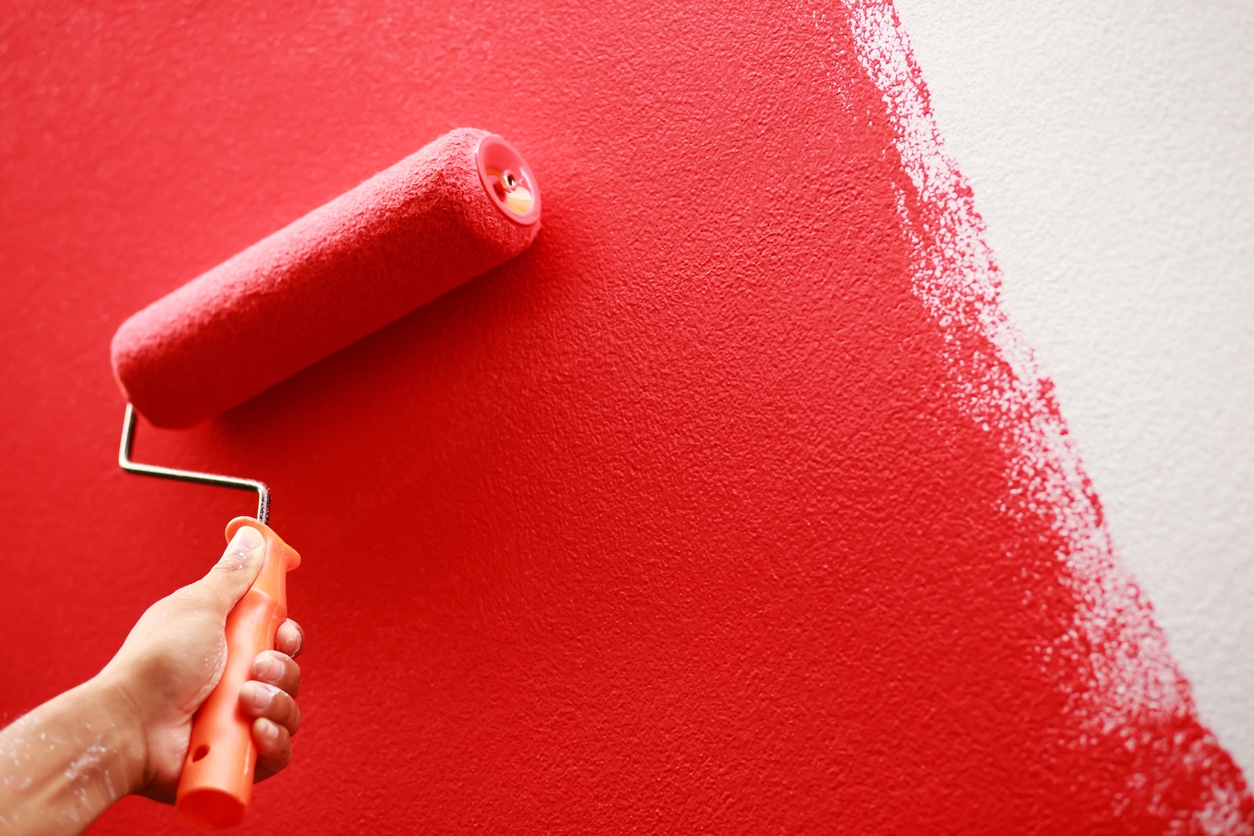
3. Rolling the Walls
Once the edges are done, use a roller to paint the larger sections of the walls. Work in small sections, applying the paint in a “W” or “M” shape to ensure even coverage. Apply multiple thin coats rather than a single thick coat for a smoother finish. Allow each coat to dry completely before applying the next.
4. Painting the Trim
After the walls are painted, focus on painting the trim, baseboards, and door frames. Use a smaller brush for accuracy and precision in these areas.
5. Blending and Touch-Ups
Check for any visible lines or edges between the brushed and rolled areas. Blend these areas while the paint is still wet for a seamless finish. Once the paint is dry, inspect the walls for missed spots or imperfections. Touch up these areas using the appropriate tools.
6. Drying and Cleanup
Drying Time: Allow sufficient drying time between coats per the paint manufacturer’s instructions. Adequate drying ensures a durable finish.
Cleanup: Clean brushes, rollers, trays, and other tools using appropriate solvents or water-based cleaners. Dispose of paint materials responsibly.
7. Final Inspection
Once the paint is dry, conduct a final inspection. Check for uniformity, smoothness, and any touch-up areas needing attention.
8. Reassembling the Room
After the paint has fully cured, reassemble the room by moving furniture back in and rearranging decorations and fixtures.
Post-Paint Care and Cleanup
1. Removing Protective Coverings
Remove painter’s tape plastic coverings or drop cloths from surfaces and furniture. Take care to avoid dislodging any freshly painted areas.
2. Cleaning Paint Tools and Equipment
Clean paint brushes, rollers, and trays thoroughly with appropriate cleaning agents or water according to the paint type used. Ensure they are completely dry before storing.
3. Disposing of Paint Materials
Dispose of leftover paint, empty cans, used tape, and any other paint-related waste responsibly, following local regulations for proper disposal of paint materials.
4. Inspecting for Touch-Ups
Once the paint has dried completely, inspect the walls for any missed spots, uneven areas, or imperfections that might require touch-ups. Use the same paint and application tools to address these areas carefully. Feather the paint into the existing coat for a seamless finish.
5. Cleaning the Space
After completing touch-ups, give the room a thorough cleaning. Remove paint splatters or residue from floors, windows, and fixtures using appropriate cleaning solutions.
Also, clean and return any furniture or decor that was temporarily moved or covered during the painting process.
6. Ventilation and Final Inspection
Maintain good ventilation in the room by keeping windows open or using fans to ensure any lingering paint odors dissipate quickly. Take a final walkthrough of the painted space to ensure all touch-ups are seamless, the room is clean, and the paint job meets your expectations.
7. Proper Storage of Paint and Materials:
Seal paint is canned properly and stored in a cool, dry place away from extreme temperatures. Label the cans for easy identification in the future.
Also, store cleaned and dried paint tools and equipment in an organized manner for future use.
Final Inspections and Touch-Ups
As you near the completion of your interior painting project, conducting a thorough final inspection and addressing any touch-ups are essential for achieving a flawless finish.
1. Methodical Evaluation
Begin by scrutinizing the painted surfaces under adequate lighting conditions. Look for inconsistencies in color, texture, or any overlooked areas that require attention.
Run your hands along the walls to detect any imperfections like bumps or rough spots that might not be immediately visible.
2. Addressing Imperfections
For minor imperfections such as missed spots, thin areas, or drips, prepare a small amount of paint and carefully touch these areas using a fine brush or roller.
Feather the paint into the existing coat, blending it seamlessly with the surrounding area to avoid visible patches.
3. Blending Techniques
Use techniques such as feathering or cross-hatching to ensure a seamless blend between the touched-up spots and the rest of the wall. These methods help in creating a smooth transition and eliminating any demarcation lines.
Allow the touch-up paint to dry completely before evaluating the blending quality.
4. Verifying Uniformity
Step back and observe the walls from different angles and distances. Check for color, sheen, and texture uniformity to ensure an even and consistent finish across the entire surface.
Address any remaining discrepancies or irregularities to achieve a cohesive appearance.
5. Fine-Tuning Details
Pay attention to corners, edges, and areas where two colors meet. These sections often require meticulous attention to ensure crisp lines and a polished look. Use a steady hand and precision tools to refine these details.
6. Revisiting Previous Work
Review areas that were previously touched up or repaired during the painting process. Ensure these sections seamlessly integrate with the rest of the wall, maintaining a consistent appearance. Make any necessary adjustments to refine these areas for a cohesive overall look.
7. Final Verification and Satisfaction
Once all touch-ups are completed, conduct a final inspection to verify that all imperfections have been addressed to your satisfaction.
Maintaining Painted Surfaces
1. Regular Cleaning Routine
Dust Removal: Painted surfaces are regularly cleaned using a soft cloth or a vacuum cleaner with a soft brush attachment. This prevents dust buildup that can dull the paint’s finish over time.
Gentle Cleaning Solutions: Use mild soap or detergent solutions with warm water for stains or marks. Avoid abrasive cleaners or harsh chemicals that could damage the paint.
2. Prompt Stain Removal
Address spills or stains promptly to prevent them from settling into the paint. Blot stains gently with a clean, damp cloth or sponge without rubbing vigorously. Refrain from using abrasive materials or rough scrubbers that might scratch or remove the paint.
3. Protection from Physical Damage
Furniture Padding: Attach felt pads or soft bumpers to the bottoms of furniture legs to prevent scratches or scuff marks on painted floors or walls.
Careful Handling: Exercise caution while moving objects against painted surfaces to prevent accidental dings or scrapes.
4. Maintaining Exterior Surfaces
Regular Inspection: Check exterior painted surfaces periodically for signs of wear, peeling, or cracking. Addressing issues promptly can prevent further damage.
Repainting as Needed: Schedule repainting for exterior surfaces as soon as signs of deterioration appear to protect the underlying structure from weather elements.
5. Avoiding Moisture Buildup
Ventilation: Ensure proper ventilation in areas prone to moisture buildup, like bathrooms and kitchens. Adequate ventilation helps prevent paint damage due to humidity.
Addressing Leaks: Repair any leaks promptly to prevent water damage to painted surfaces, which could lead to paint peeling or mold growth.
6. Record Keeping for Maintenance
Documentation: Keep records of the paint colors, types, and brands used for future touch-ups or repainting. This ensures consistency and ease when reapplying paint.
Conclusion
Maintaining the pristine appearance of painted surfaces goes beyond the initial application. Regular cleaning, prompt stain removal, and protective measures are pivotal in preserving the vibrancy and durability of these surfaces.
By adhering to a consistent maintenance routine, homeowners in Sunol, CA can safeguard against wear, stains, and weather-related damage, ensuring that painted walls and exteriors retain their allure and protective coating for years to come.
Remember, proactive care and periodic touch-ups not only sustain the aesthetics but also contribute to the longevity of painted surfaces. This safeguards your investment and maintains the ambiance of your cherished living spaces.
Reach out to Custom Painting, Inc. today and let us help you bring your vision to life with our expert painting services. Whether you have questions, need more information, or are ready to start your project, we’re here to assist you. For immediate assistance or to speak directly with a member of our team, please call us at 925-294-8062. Prefer to reach out online? Fill out our online contact form on our website. Provide your details and a brief message about your project, and one of our representatives will get back to you promptly.