

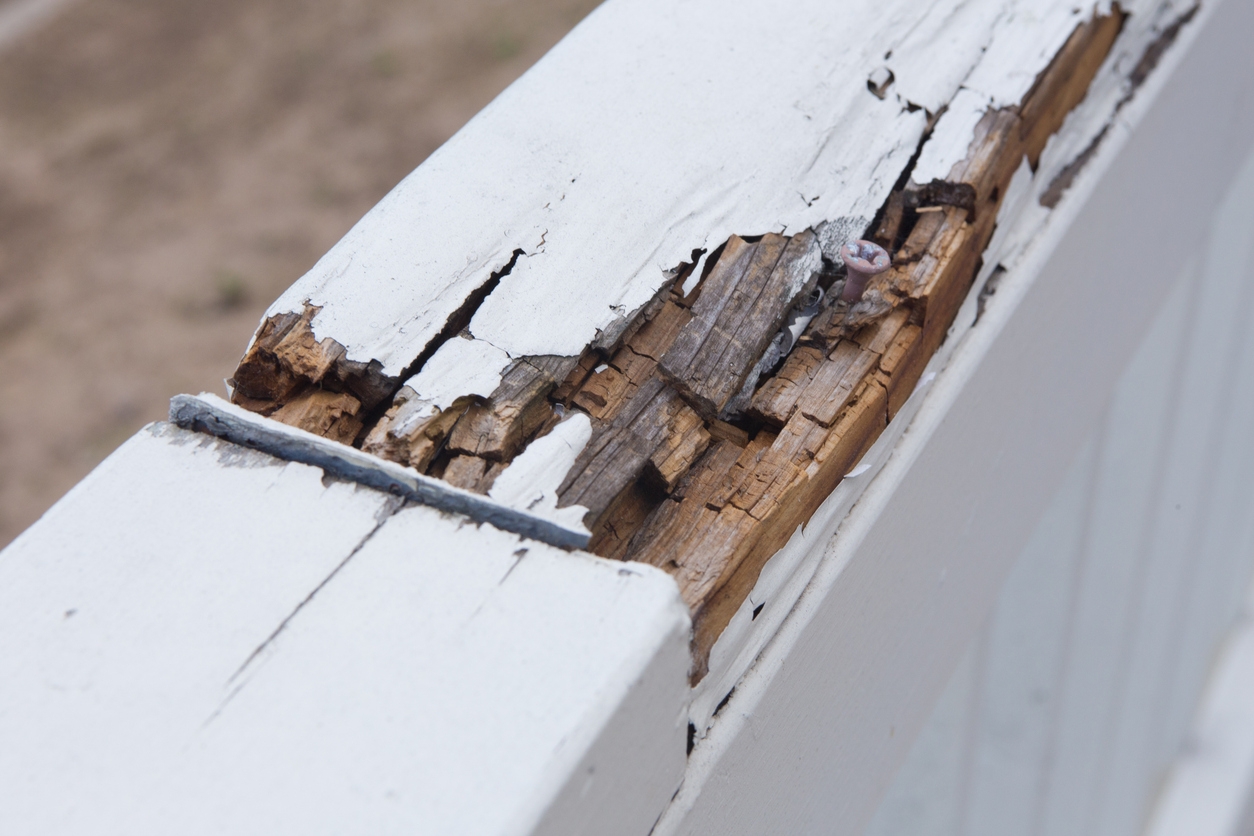
If there’s rotted wood in your home in Pleasanton, CA, it could be a severe issue. Wood rot compromises your bathroom’s structural integrity and can lead to severe damage. Moisture exposure promotes wood rot, spreading and weakening surrounding materials. Its important that you address wood rot promptly to prevent further deterioration. It also reduces the risk of mold growth. Ultimately, immediate detection and repairs maintain your property’s safety and value.
Here’s a brief overview of the wood rot repair process:
- Identifying rotted wood – Inspection, probing the wood for softness beneath the surface, and detecting hidden moisture content.
- Repairing rotted wood – Removal of rotted sections, treating remaining wood, and filling the gaps.
- Preparing wood for painting – Sanding and priming surfaces.
- Painting – Applying the sanded and primed surfaces with new coats of paint.
Identifying rotted wood
Watch out for the following signs of wood rot:
- Discoloration – Wood may appear darker, lighter, or have a different shade than unaffected areas.
- Softness – Rotted wood feels soft and spongy when pressed.
- Deterioration – Wood starts to crumble, crack, or break apart easily.
Look for the common areas prone to rot in bathrooms:
- Around the bathtub and shower – Frequent exposure to water and humidity.
- Under sinks – Leaks and moisture buildup.
- Baseboards and trim – Areas where water can seep in from the floor.
Have the following tools and techniques for assessing wood rot’s extent:
- Visual inspection – Look for discoloration and visible damage.
- Probe with a screwdriver or awl – Press into the wood to check for softness or crumbling.
- Moisture meter – This tool measures wood’s moisture content to identify areas with high moisture levels.
- Thermal imaging camera – This device detects temperature variations indicating moisture buildup and rotting behind walls or under floors.
Materials and tools needed
Essential tools:
- Screwdriver
- Chisel
- Sandpaper
- Putty knife
- Utility knife
- Paintbrush
- Drill
Materials required for repair:
- Wood hardener
- Wood filler
- Sealant
- Replacement wood (if necessary)
- Primer
- Paint
Safety gear:
- Gloves
- Goggles
- Mask
- Apron, overall, or other protective clothing
Removing rotted wood
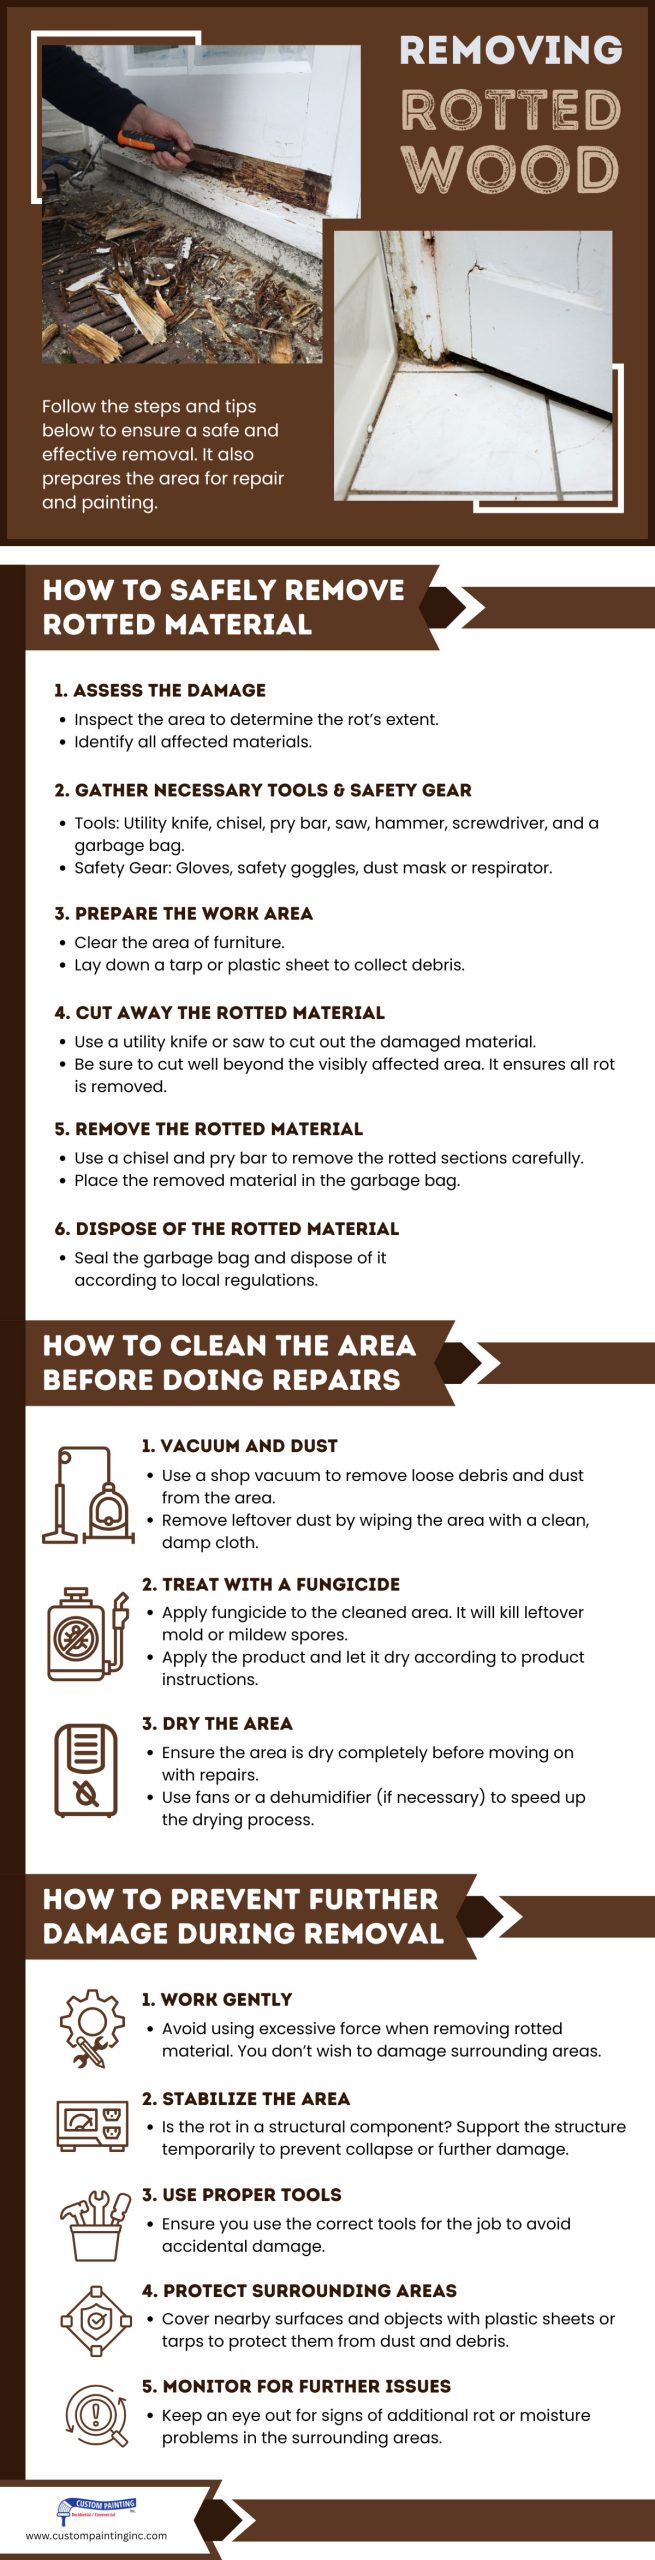
Follow the steps and tips below to ensure a safe and effective removal. It also prepares the area for repair and painting.
How to safely remove rotted material
1. Assess the damage
- Inspect the area to determine the rot’s extent.
- Identify all affected materials.
2. Gather necessary tools and safety gear
- Tools: Utility knife, chisel, pry bar, saw, hammer, screwdriver, and a garbage bag.
- Safety Gear: Gloves, safety goggles, dust mask or respirator.
3. Prepare the work area
- Clear the area of furniture.
- Lay down a tarp or plastic sheet to collect debris.
4. Cut away the rotted material
- Use a utility knife or saw to cut out the damaged material.
- Be sure to cut well beyond the visibly affected area. It ensures all rot is removed.
5. Remove the rotted material
- Use a chisel and pry bar to remove the rotted sections carefully.
- Place the removed material in the garbage bag.
6. Dispose of the rotted material
- Seal the garbage bag and dispose of it according to local regulations.
How to clean the area before doing repairs
1. Vacuum and dust
- Use a shop vacuum to remove loose debris and dust from the area.
- Remove leftover dust by wiping the area with a clean, damp cloth.
2. Treat with a fungicide
- Apply fungicide to the cleaned area. It will kill leftover mold or mildew spores.
- Apply the product and let it dry according to product instructions.
3. Dry the area
- Ensure the area is dry completely before moving on with repairs.
- Use fans or a dehumidifier (if necessary) to speed up the drying process.
How to prevent further damage during removal
1. Work gently – Avoid using excessive force when removing rotted material. You don’t wish to damage surrounding areas.
2. Stabilize the area – Is the rot in a structural component? Support the structure temporarily to prevent collapse or further damage.
3. Use proper tools – Ensure you use the correct tools for the job to avoid accidental damage.
4. Protect surrounding areas – Cover nearby surfaces and objects with plastic sheets or tarps to protect them from dust and debris.
5. Monitor for further issues – Keep an eye out for signs of additional rot or moisture problems in the surrounding areas.
Repairing the damage
After removing wood rot, follow these steps:
Using wood hardeners to stabilize the area
- Apply the wood hardener to the affected area using a brush.
- Allow the hardener to penetrate and cure, following the manufacturer’s instructions.
- The wood hardener strengthens the remaining wood fibers. It also prepares the surface for filler.
Applying and shaping wood filler to restore the wood’s shape
- Mix the wood filler according to the package directions.
- Press the filler into the stabilized area, overfilling slightly to account for shrinkage.
- Shape the filler to roughly match the wood’s original contours.
Sanding the filler for a smooth and flush surface
- Once the filler has dried completely, sand it down using progressively finer sandpaper.
- Sand until the surface is smooth and level with the surrounding wood.
- Ensure the transitions between the filler and original wood are seamless.
Preparing for painting
After removing the rot and repairing the remaining healthy wood, follow the steps below for surface preparation and painting. It guarantees a smooth and durable finish on the repaired wood surface.
Priming the wood
1. Selecting the correct primer
- Type – Use an oil-based or shellac-based primer. It ensures better adhesion and sealing, especially if the wood has significant repairs.
- Purpose – It ensures it seals the surface, blocks stains, and provides a good base for paint.
2. Applying the primer
- Preparation – Ensure the wood surface is clean, dry, and dust-free.
- Method – Depending on the size and detail of the area, apply the primer using a brush, roller, or sprayer.
- Coverage – Apply a thin, even coat to avoid drips and ensure complete coverage.
- Drying time – Allow the primer to dry completely, following the manufacturer’s instructions, before sanding.
3. Sanding the primed wood
Purpose – To smooth the surface and ensure a flawless finish.
Process:
- Sandpaper Grit – Use fine-grit sandpaper (220-320 grit) for a smooth finish.
- Technique – Sand lightly in the wood grain’s direction to avoid scratches and achieve a uniform surface.
- Dust Removal – Wipe off the sanding dust with a tack cloth or a damp rag. It ensures a clean surface for painting.
Final considerations before painting
- Cleaning – Ensure the primed and sanded surface is completely clean and free of dust or debris.
- Taping – Use painter’s tape to mask off areas you won’t paint. They include trim, edges, or adjoining surfaces.
- Inspection – Check for flaws or areas needing touch-ups before applying the final paint.
Conclusion
Repairing rotted wood in bathrooms ensures a durable and professional finish. Identify wood rot early, remove it, repair the surfaces, and prepare them for new paint. Following these steps maintains the bathroom’s structural integrity and aesthetics. It also prevents further damage and costly repairs. A well-maintained bathroom enhances a Sunol, CA home’s overall value, making it a wise investment for homeowners.
Custom Painting, Inc. expertly removes wood rot and gives your home a fresh look. As a licensed, bonded, and insured paint contractor, we assure you that your home is in good hands. If your property has a significant wood rot problem, call us at 925-294-8062 or message us here for a free job quote.