
When it comes to painting your San Ramon, CA area home, the final results depend on more than just the quality of the paint and the skill of the painter. One critical step that often gets overlooked is surface preparation. Properly preparing the surface before painting can significantly impact the durability, appearance, and overall success of the paint job. This article explains the reasons why taking the time to prepare surfaces thoroughly can make all the difference in achieving a beautiful and long-lasting finish for your home in Livermore.
Understanding Surface Preparation
Surface preparation is a crucial step in the painting process that involves cleaning, repairing, and priming surfaces to ensure the paint adheres properly and lasts longer. By preparing the surface correctly, you can achieve a smooth, durable, and visually appealing finish. Let’s dig into what surface preparation entails, the types of surfaces that need it, and the steps involved in the process.
Definition of Surface Preparation
Surface preparation refers to the process of treating a surface before applying paint or another coating. This involves cleaning, sanding, filling holes or cracks, and applying a primer if necessary. Proper surface preparation ensures that the paint adheres well, covers evenly, and resists peeling, cracking, or other forms of deterioration over time.
Common Types of Surfaces that Require Preparation
Different surfaces require different preparation techniques to achieve the best results. Here are some common surfaces that typically need preparation before painting:
- Wood: Includes furniture, trim, and siding. Wood must be sanded to remove old paint and smooth the surface, and any holes or cracks should be filled.
- Drywall: Commonly found in interior walls and ceilings. The drywall needs to be cleaned, sanded, and patched to repair any damage before painting.
- Stucco: Often used in exterior walls. Stucco requires cleaning to remove dirt and debris, and any cracks or chips should be repaired.
- Metal: Found in railings, gutters, and other structural elements. Metal surfaces need to be cleaned to remove rust and debris, and a primer may be necessary to ensure proper paint adhesion.
Overview of the Steps Involved in Surface Preparation
Proper surface preparation involves several key steps. Here’s an overview of what you need to do:
- Cleaning: Remove dirt, grease, mildew, and other contaminants from the surface. This can be done using soap and water, a pressure washer service, or specialized cleaning solutions, depending on the surface.
- Sanding: Smooth out rough spots, remove old paint, and create a surface that the new paint can adhere to. Use sandpaper or a sanding machine for larger areas.
- Repairing: Fill any holes, cracks, or imperfections with appropriate fillers or patching compounds. Allow the repairs to dry and sand them smooth.
- Priming: Apply a primer to the surface to create a uniform base for the paint. Priming helps the paint adhere better and provides better coverage, especially on porous or uneven surfaces.
By understanding and following these steps, you can ensure that your painting project starts on the right foot, leading to a beautiful and lasting finish.
Benefits of Proper Surface Preparation
Taking the time to prepare surfaces before painting offers numerous benefits that contribute to the overall success and longevity of the paint job. Proper surface preparation ensures that the paint adheres well, lasts longer, looks better, and avoids common painting issues. Here are some key benefits of proper surface preparation:
Enhanced Paint Adhesion
Proper surface preparation significantly enhances paint adhesion. When a surface is clean, smooth, and free from contaminants, the paint can bond more effectively. This strong bond between the paint and the surface ensures that the paint stays put, reducing the likelihood of peeling or flaking over time. Enhanced adhesion is particularly important for high-traffic areas or exterior surfaces exposed to the elements.
Increased Longevity of the Paint Job
Surface preparation extends the life of your paint job. By removing old paint, repairing damages, and applying a suitable primer, you create a stable foundation for the new paint. This stability helps the paint withstand daily wear and tear, environmental factors, and other challenges, ensuring that your paint job remains intact and looks fresh for many years.
Improved Appearance and Uniformity of the Paint Finish
A well-prepared surface leads to a more attractive and uniform paint finish. Smoothing out rough spots, filling holes and cracks, and applying a primer create an even surface that allows the paint to be applied smoothly and evenly. The result is a professional-looking finish with consistent color and texture, enhancing the overall aesthetic appeal of your space.
Prevention of Common Painting Problems
Proper surface preparation helps prevent common painting problems such as peeling, blistering, and cracking. These issues often arise when the paint does not adhere well to the surface or when there are underlying defects. By thoroughly cleaning, repairing, and priming the surface, you can minimize the risk of these problems, ensuring a durable and flawless paint job.
- Peeling: Caused by poor adhesion and can be avoided by cleaning and sanding the surface.
- Blistering: Occurs when paint bubbles form due to trapped moisture or air. Proper cleaning and priming can prevent this.
- Cracking: This results from an unstable surface or the application of paint too thickly. Sanding and repairing the surface help prevent cracking.
Proper surface preparation is essential for achieving a high-quality paint job for your home in Fremont, CA. By enhancing adhesion, increasing longevity, improving appearance, and preventing common problems, thorough preparation ensures that your painting project is successful and long-lasting. Taking the time to prepare the surface properly is a worthwhile investment that pays off in the form of a beautiful, durable finish.
Steps Involved in Surface Preparation
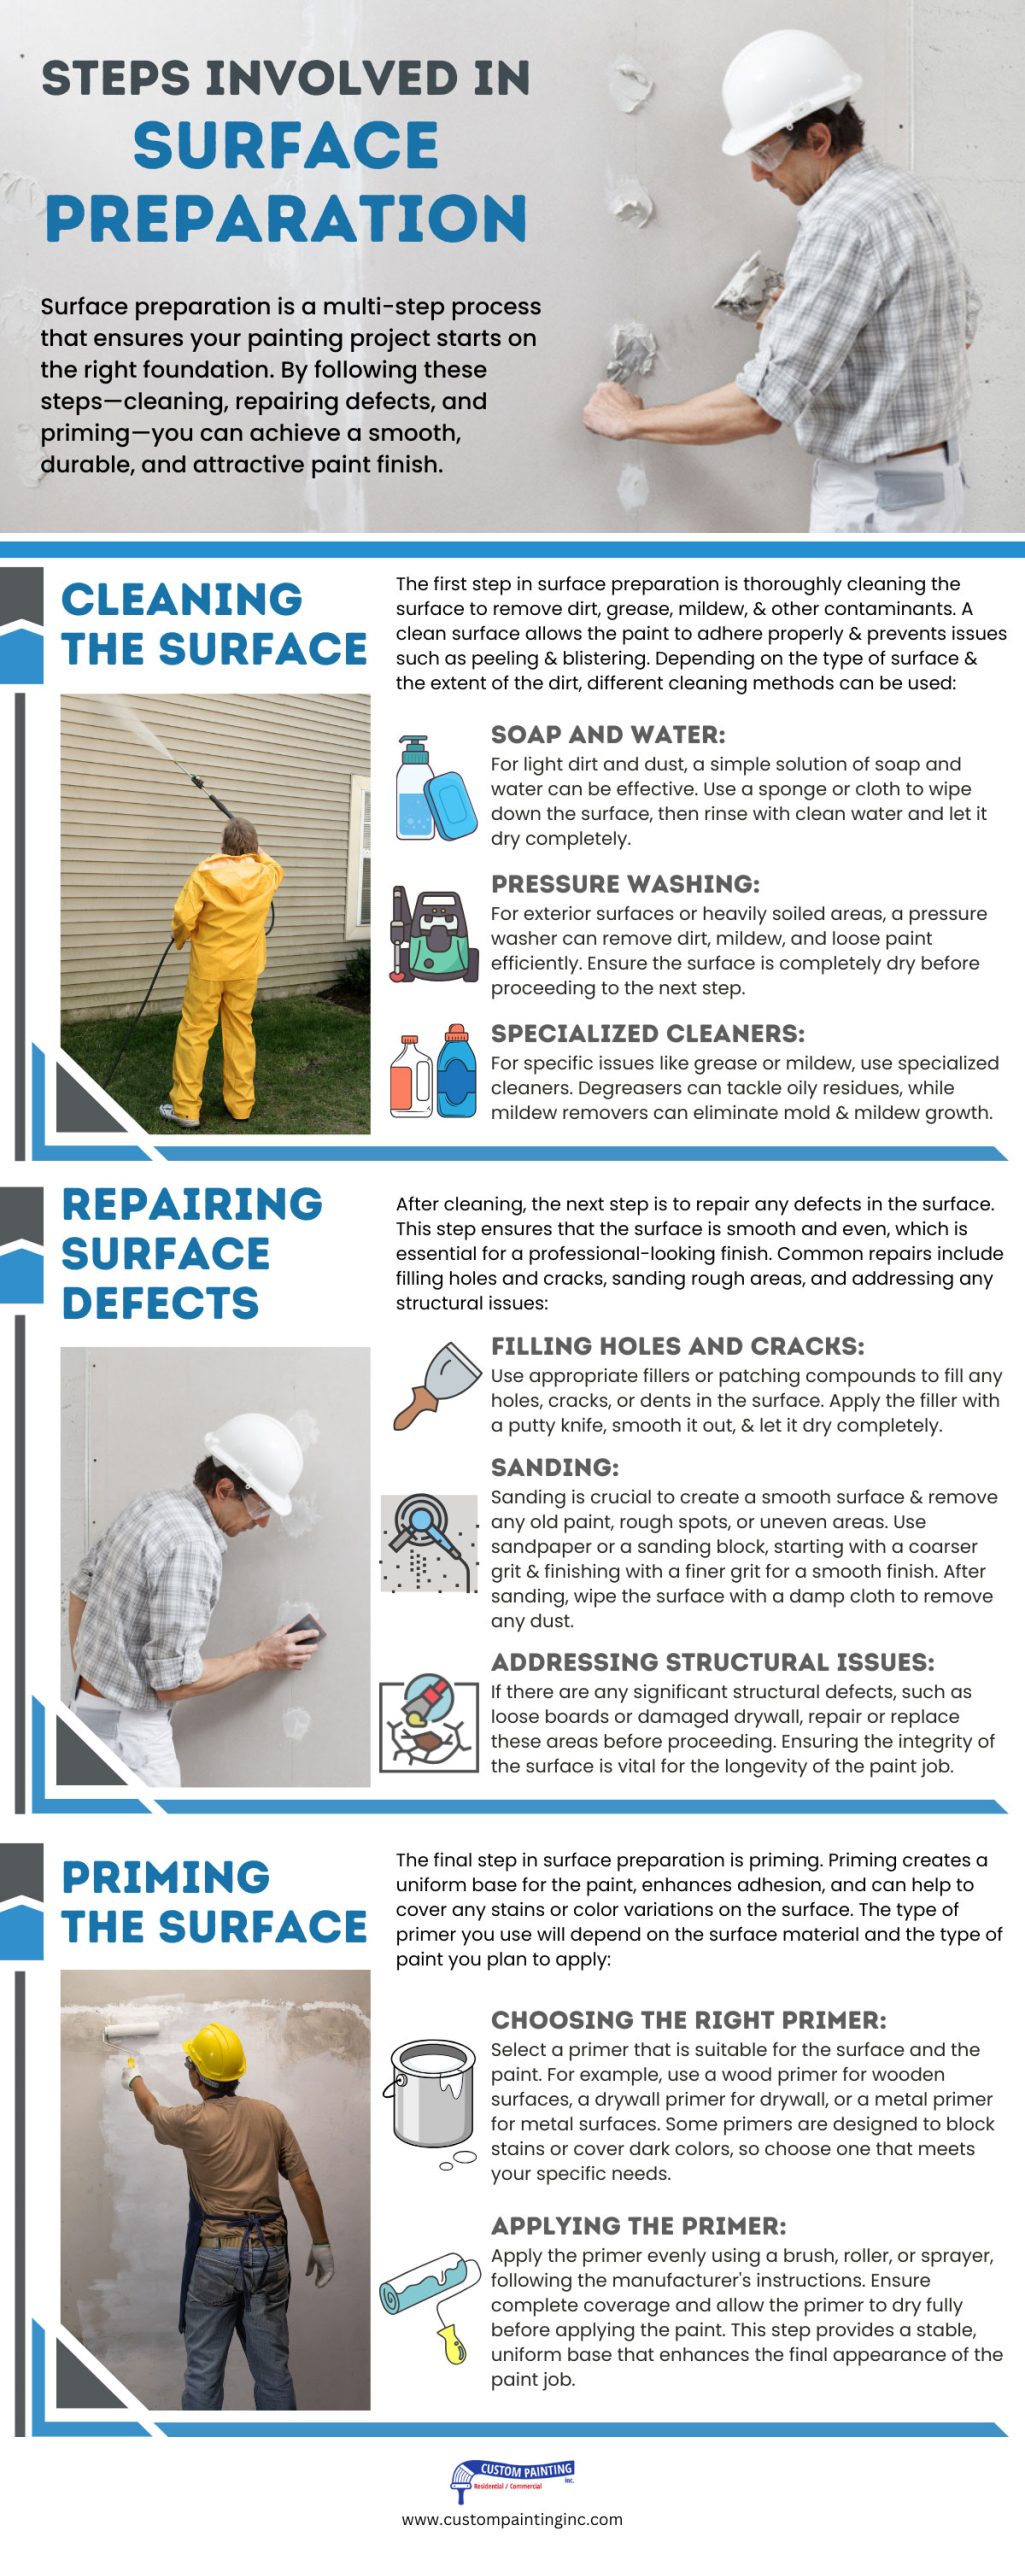
Surface preparation is a multi-step process that ensures your painting project starts on the right foundation. By following these steps—cleaning, repairing defects, and priming—you can achieve a smooth, durable, and attractive paint finish.
Cleaning the Surface
The first step in surface preparation is thoroughly cleaning the surface to remove dirt, grease, mildew, and other contaminants. A clean surface allows the paint to adhere properly and prevents issues such as peeling and blistering. Depending on the type of surface and the extent of the dirt, different cleaning methods can be used:
- Soap and Water: For light dirt and dust, a simple solution of soap and water can be effective. Use a sponge or cloth to wipe down the surface, then rinse with clean water and let it dry completely.
- Pressure Washing: For exterior surfaces or heavily soiled areas, a pressure washer can remove dirt, mildew, and loose paint efficiently. Ensure the surface is completely dry before proceeding to the next step.
- Specialized Cleaners: For specific issues like grease or mildew, use specialized cleaners. Degreasers can tackle oily residues, while mildew removers can eliminate mold and mildew growth.
Repairing Surface Defects
After cleaning, the next step is to repair any defects in the surface. This step ensures that the surface is smooth and even, which is essential for a professional-looking finish. Common repairs include filling holes and cracks, sanding rough areas, and addressing any structural issues:
- Filling Holes and Cracks: Use appropriate fillers or patching compounds to fill any holes, cracks, or dents in the surface. Apply the filler with a putty knife, smooth it out, and let it dry completely.
- Sanding: Sanding is crucial to create a smooth surface and remove any old paint, rough spots, or uneven areas. Use sandpaper or a sanding block, starting with a coarser grit and finishing with a finer grit for a smooth finish. After sanding, wipe the surface with a damp cloth to remove any dust.
- Addressing Structural Issues: If there are any significant structural defects, such as loose boards or damaged drywall, repair or replace these areas before proceeding. Ensuring the integrity of the surface is vital for the longevity of the paint job.
Priming the Surface
The final step in surface preparation is priming. Priming creates a uniform base for the paint, enhances adhesion, and can help to cover any stains or color variations on the surface. The type of primer you use will depend on the surface material and the type of paint you plan to apply:
- Choosing the Right Primer: Select a primer that is suitable for the surface and the paint. For example, use a wood primer for wooden surfaces, a drywall primer for drywall, or a metal primer for metal surfaces. Some primers are designed to block stains or cover dark colors, so choose one that meets your specific needs.
- Applying the Primer: Apply the primer evenly using a brush, roller, or sprayer, following the manufacturer’s instructions. Ensure complete coverage and allow the primer to dry fully before applying the paint. This step provides a stable, uniform base that enhances the final appearance of the paint job.
By following these steps—cleaning the surface, repairing defects, and priming—you can ensure that your painting project achieves the best possible results. Proper surface preparation is key to a beautiful, durable, and long-lasting paint finish for your San Ramon home.
Common Mistakes in Surface Preparation
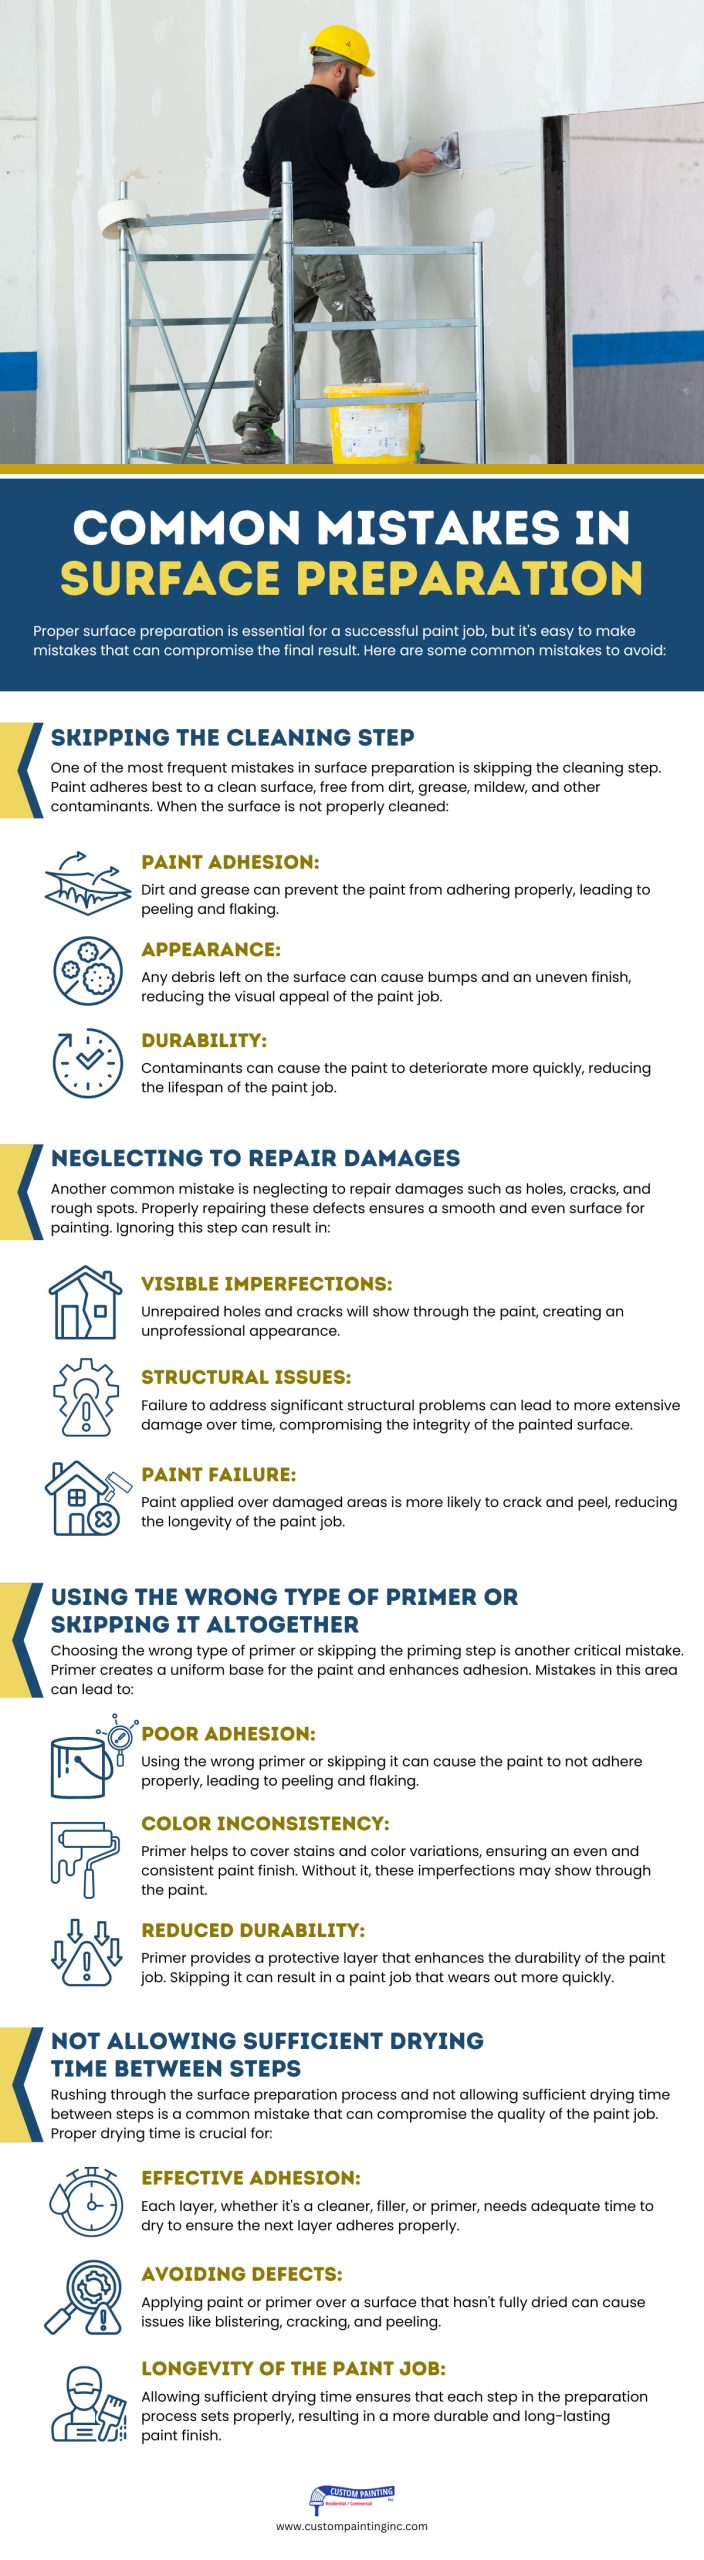
Proper surface preparation is essential for a successful paint job, but it’s easy to make mistakes that can compromise the final result. Here are some common mistakes to avoid:
Skipping the Cleaning Step
One of the most frequent mistakes in surface preparation is skipping the cleaning step. Paint adheres best to a clean surface, free from dirt, grease, mildew, and other contaminants. When the surface is not properly cleaned:
- Paint Adhesion: Dirt and grease can prevent the paint from adhering properly, leading to peeling and flaking.
- Appearance: Any debris left on the surface can cause bumps and an uneven finish, reducing the visual appeal of the paint job.
- Durability: Contaminants can cause the paint to deteriorate more quickly, reducing the lifespan of the paint job.
Neglecting to Repair Damages
Another common mistake is neglecting to repair damages such as holes, cracks, and rough spots. Properly repairing these defects ensures a smooth and even surface for painting. Ignoring this step can result in:
- Visible Imperfections: Unrepaired holes and cracks will show through the paint, creating an unprofessional appearance.
- Structural Issues: Failure to address significant structural problems can lead to more extensive damage over time, compromising the integrity of the painted surface.
- Paint Failure: Paint applied over damaged areas is more likely to crack and peel, reducing the longevity of the paint job.
Using the Wrong Type of Primer or Skipping It Altogether
Choosing the wrong type of primer or skipping the priming step is another critical mistake. Primer creates a uniform base for the paint and enhances adhesion. Mistakes in this area can lead to:
- Poor Adhesion: Using the wrong primer or skipping it can cause the paint to not adhere properly, leading to peeling and flaking.
- Color Inconsistency: Primer helps to cover stains and color variations, ensuring an even and consistent paint finish. Without it, these imperfections may show through the paint.
- Reduced Durability: Primer provides a protective layer that enhances the durability of the paint job. Skipping it can result in a paint job that wears out more quickly.
Not Allowing Sufficient Drying Time Between Steps
Rushing through the surface preparation process and not allowing sufficient drying time between steps is a common mistake that can compromise the quality of the paint job. Proper drying time is crucial for:
- Effective Adhesion: Each layer, whether it’s a cleaner, filler, or primer, needs adequate time to dry to ensure the next layer adheres properly.
- Avoiding Defects: Applying paint or primer over a surface that hasn’t fully dried can cause issues like blistering, cracking, and peeling.
- Longevity of the Paint Job: Allowing sufficient drying time ensures that each step in the preparation process sets properly, resulting in a more durable and long-lasting paint finish.
By avoiding these common mistakes—skipping the cleaning step, neglecting to repair damages, using the wrong type of primer or skipping it, and not allowing sufficient drying time—you can ensure that your surface preparation is thorough and effective. Proper surface preparation is the foundation of a successful paint job, leading to a beautiful, durable, and long-lasting finish.
Expert Tips for Effective Surface Preparation
Achieving a professional-quality paint job starts with effective surface preparation. Here are some expert tips to help you prepare surfaces properly, whether you’re a DIY enthusiast or a professional painter.
Recommended Tools and Materials
Having the right tools and materials is essential for effective surface preparation. Here are some must-haves:
- Cleaning Supplies: Mild soap, water, sponges, scrub brushes, mildew remover, degreasers, and a pressure washer (for exterior surfaces).
- Sanding Tools: Sandpaper (various grits), sanding blocks, or electric sanders.
- Repair Materials: Spackle or joint compound for drywall, wood filler, caulk, putty knife, and patching compounds.
- Primers: Select primers suitable for the type of surface and paint. Options include wood primers, drywall primers, stain-blocking primers, and rust-inhibiting primers.
- Protective Gear: Safety goggles, gloves, dust masks, and drop cloths to protect surrounding areas.
- Miscellaneous: Paint scrapers, wire brushes, rags, and a vacuum cleaner to remove dust.
Best Practices for Different Types of Surfaces
Different surfaces require specific preparation techniques. Here are the best practices for common surfaces:
- Wood:
- Cleaning: Remove dirt, dust, and any old paint or varnish using a scraper or sandpaper.
- Repairing: Fill holes and cracks with wood filler and sand smooth.
- Priming: Apply a wood primer to seal the surface and enhance paint adhesion.
- Drywall:
- Cleaning: Wipe down with a damp cloth to remove dust.
- Repairing: Use spackle or joint compound to fill any holes, cracks, or dents, and sand smooth.
- Priming: Use a drywall primer to create a uniform surface for painting.
- Stucco:
- Cleaning: Use a pressure washer to remove dirt and debris.
- Repairing: Patch any cracks or holes with stucco patching compound and allow to dry.
- Priming: Apply a masonry primer to ensure good paint adhesion.
- Metal:
- Cleaning: Remove rust, dirt, and grease using a wire brush and degreaser.
- Repairing: Sand to smooth out any rough spots.
- Priming: Use a rust-inhibiting metal primer to prevent rust and enhance adhesion.
Tips for DIY Enthusiasts vs. Professional Painters
Both DIY enthusiasts and professional painters can achieve excellent results with the right approach, but their strategies may differ slightly:
- DIY Enthusiasts:
- Take Your Time: Don’t rush through surface preparation. Allow sufficient time for each step to ensure the best results.
- Start Small: If you’re new to painting, start with smaller projects to gain confidence and experience.
- Follow Instructions: Carefully read and follow the manufacturer’s instructions for all products used, including cleaners, fillers, and primers.
- Professional Painters:
- Efficiency: Use professional-grade tools and materials to speed up the preparation process without compromising quality.
- Attention to Detail: Pay close attention to every step, as the quality of your work will impact your reputation and client satisfaction.
- Advanced Techniques: Employ advanced techniques, such as power sanding and specialized primers, to handle challenging surfaces and ensure long-lasting results.
By following these expert tips and best practices, you can ensure effective surface preparation for any painting project. Whether you’re a DIY enthusiast or a professional painter, proper preparation is key to achieving a beautiful, durable, and long-lasting paint finish.
Conclusion
Proper surface preparation is essential for achieving a beautiful and durable paint job. By cleaning, repairing, and priming surfaces correctly, you can enhance paint adhesion, improve appearance, and prevent common issues like peeling and cracking. For professional assistance, contact Custom Painting, Inc. at 925-294-8062 or fill out our contact form. We’re here to help you achieve the best results for your painting project.