
Removing paint from metal objects can be a tricky task, but it’s essential for restoring items to their original condition or preparing them for a fresh coat of paint. Whether you’re dealing with a vintage piece of furniture, metal tools, or outdoor fixtures, knowing the right techniques can save time and effort. In this article, we’ll tackle various methods for safely and effectively removing paint from metal surfaces, including chemical strippers, heat guns, and natural solutions. Each method has its advantages and best-use scenarios, helping you choose the right approach for your project.
Assessing the Metal Object
Before starting the paint removal process, it’s crucial to assess the metal object. Understanding the type of metal and the type of paint will help you choose the most appropriate and effective removal method. This step ensures you avoid damaging the metal while successfully removing the paint.
Type of Metal
Identifying the type of metal is the first step in the assessment process. Different metals react differently to various paint removal methods.
- Steel: This common metal is sturdy and can handle more aggressive removal techniques like sanding and chemical strippers.
- Aluminum: Softer than steel, aluminum can be easily scratched or damaged. It requires gentler methods, such as heat guns or specialized chemical strippers.
- Brass: Brass is more delicate and can tarnish easily. It is advisable to use mild, non-abrasive methods, such as natural solutions or gentle chemical strippers.
Considering the metal’s sensitivity to different removal methods is essential. For example, using a harsh chemical stripper on aluminum might cause pitting or discoloration, while steel can tolerate it better.
Type of Paint
Another critical factor is determining the type of paint on the metal object. Different paints require different removal techniques.
- Oil-based Paint: This type of paint is durable and often requires stronger chemicals or heat to remove effectively.
- Latex Paint: Generally easier to remove, latex paint can often be stripped with less aggressive methods, such as scraping or using a mild stripper.
Evaluating the thickness and number of paint layers is also important. A single layer of latex paint might come off with a scraper, while multiple thick layers of oil-based paint could require a combination of methods for complete removal.
Preparing for Paint Removal
Proper preparation is key to a successful paint removal process. Gathering the right supplies and taking necessary safety precautions will ensure that you can remove the paint effectively while protecting yourself and the metal object.
Gathering Supplies
Before you begin, make sure you have all the necessary materials on hand. This will help streamline the process and prevent interruptions.
- Paint Stripper: Choose a chemical stripper suited to the type of paint and metal you’re working with.
- Scrapers: Metal and plastic scrapers help remove paint layers without damaging the metal surface.
- Wire Brushes: Useful for scrubbing off loose paint and rust, especially on textured or detailed areas.
- Sandpaper: Various grits are needed to smooth the metal surface after paint removal.
- Protective Gear: Essential items include gloves, masks, and goggles to protect your skin, eyes, and respiratory system from chemicals and paint particles.
Choosing the appropriate paint removal method depends on the type of metal and paint you’re dealing with. For instance, chemical strippers work well on thick, oil-based paint layers, while heat guns might be more effective for latex paint on more delicate metals like aluminum.
Safety Precautions
Safety should always be a top priority when removing paint. Here are some important precautions to take:
- Using Protective Gear: Always wear gloves to protect your hands from harsh chemicals and sharp tools. Masks and goggles are also essential to prevent inhalation of fumes and to shield your eyes from splashes and debris.
- Ensuring Proper Ventilation: If you’re using chemical strippers or working indoors, ensure that the area is well-ventilated. Open windows and use fans to circulate air and disperse harmful fumes. Working outside can also be a good option to avoid indoor air contamination.
By gathering the right supplies and following safety precautions, you’ll be well-prepared to remove paint from metal objects effectively and safely. Taking these steps ensures a smoother process and helps protect both you and the metal surfaces you’re working on.
Methods of Removing Paint from Metal Objects
There are various methods available for removing paint from metal objects, each with its advantages and best-use scenarios. Understanding these methods will help you choose the most effective approach for your specific project.
Chemical Paint Strippers
Chemical paint strippers are widely used due to their effectiveness in removing multiple layers of paint.
- How They Work: These strippers break down the paint’s bond with the metal, making it easier to scrape off.
- Application: Apply the stripper with a brush, let it sit for the recommended time, and then use a scraper to remove the softened paint.
- Considerations: Use in well-ventilated areas and wear protective gear to avoid skin and respiratory irritation.
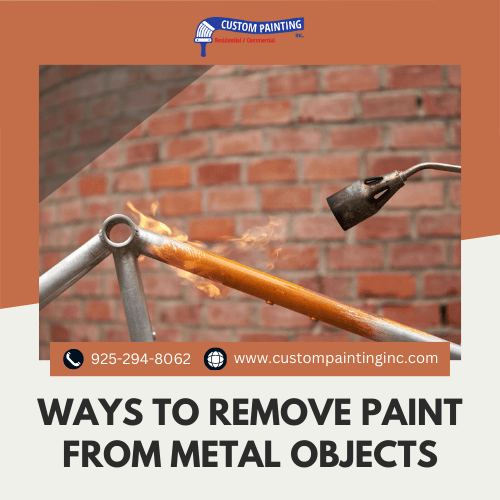
Heat Guns
Heat guns are a popular choice for removing paint from metal surfaces without the use of chemicals.
- How They Work: The heat softens the paint, making it easier to scrape off.
- Application: Hold the heat gun a few inches from the surface, moving it back and forth until the paint bubbles and peels.
- Considerations: Be cautious not to overheat and damage the metal, and always wear gloves to avoid burns.
Sanding
Sanding is a mechanical method that works well for smaller projects or detailed work.
- How It Works: Abrasive paper or pads remove the paint through friction.
- Application: Use coarse grit sandpaper to remove most of the paint, then switch to finer grits for smoothing the surface.
- Considerations: Sanding can be time-consuming and labor-intensive. It’s best for small areas or intricate details.
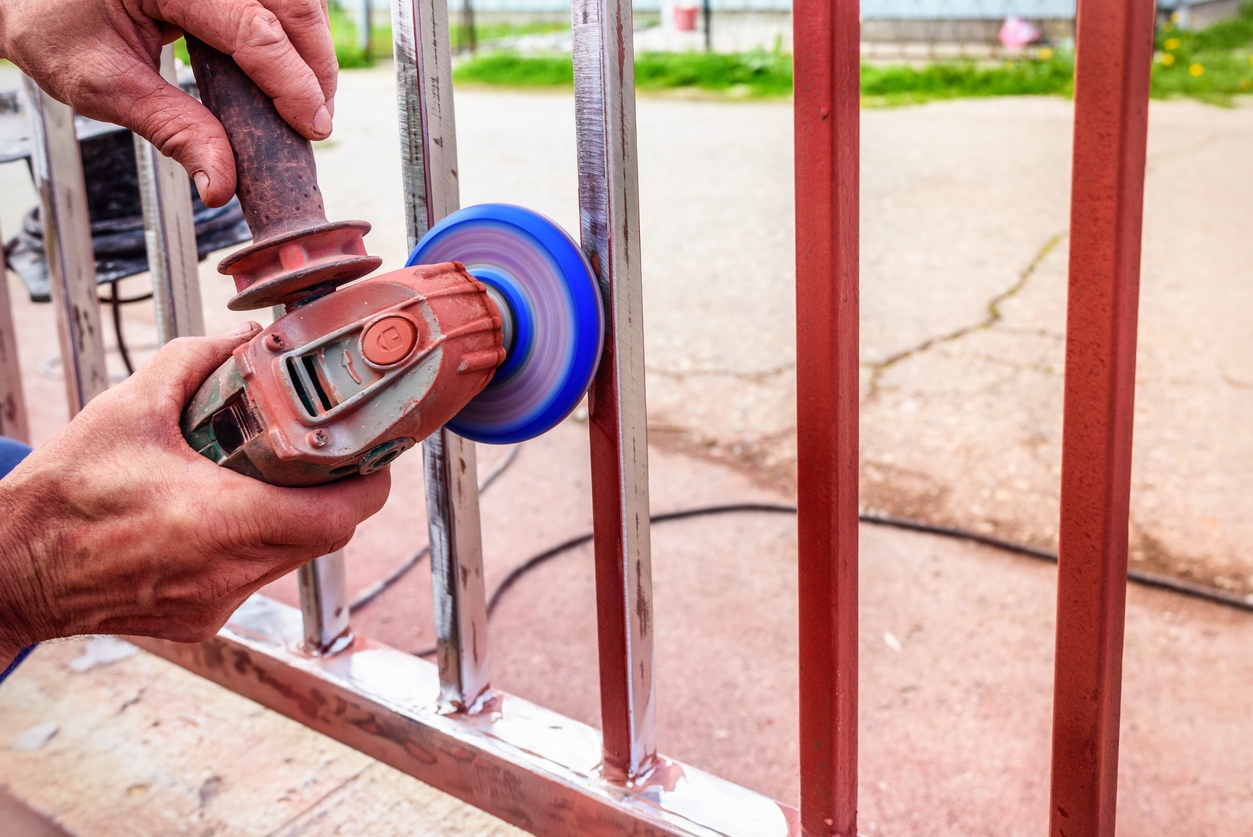
Wire Brushes and Wheels
Wire brushes and wheels are effective for removing paint from textured or rough metal surfaces.
- How They Work: The bristles of the brush or wheel scrape off the paint.
- Application: Attach a wire brush or wheel to a drill or use a handheld brush to scrub the paint away.
- Considerations: Use protective goggles to shield your eyes from flying debris and ensure you have a firm grip on the tool.
Natural and Home Remedies
For those who prefer eco-friendly methods, natural and home remedies can also be effective.
- How They Work: Common household items like baking soda, vinegar, or lemon juice can help break down paint.
- Application: Soak a cloth in the solution and apply it to the paint, letting it sit before scrubbing with a brush or scraper.
- Considerations: These methods are usually less aggressive and may require more time and effort for thick or multiple paint layers.
Electrolysis
Electrolysis is a specialized method often used for restoring antique metal objects.
- How It Works: An electrical current is passed through a solution, causing the paint to detach from the metal.
- Application: Requires a power source, electrodes, and an electrolyte solution. Submerge the metal object in the solution and connect it to the electrodes.
- Considerations: This method is complex and typically used for delicate or valuable items. It requires a thorough understanding of the process and proper safety measures.
Each method has unique advantages, and the choice depends on the type of metal, the type of paint, and the extent of the paint coverage. By selecting the appropriate technique, you can efficiently remove paint and prepare your metal objects for restoration or repainting.
Detailed Steps for Chemical Paint Stripping
Chemical paint stripping is a highly effective method for removing paint from metal objects. By following these detailed steps, you can ensure a thorough and safe paint removal process.
1. Gather Supplies
Before starting, make sure you have all the necessary materials:
- Chemical paint stripper
- Paintbrush
- Scrapers (metal and plastic)
- Drop cloths or old newspapers
- Protective gloves, goggles, and mask
- Container for used paint and stripper
- Cleaning rags
- Mild detergent and water
2. Prepare the Work Area
Set up your workspace in a well-ventilated area, preferably outdoors or in a garage with open windows. Lay down drop cloths or old newspapers to protect the floor and catch any drips or debris.
3. Apply the Paint Stripper
- Wear Protective Gear: Put on gloves, goggles, and a mask to protect yourself from chemical fumes and splashes.
- Shake or Stir the Stripper: Follow the manufacturer’s instructions for preparing the paint stripper. Some need shaking, while others need stirring.
- Apply a Thick Coat: Use a paintbrush to apply a thick, even coat of the stripper to the painted metal surface. Be generous with the application to ensure it penetrates all layers of paint.
4. Let the Stripper Work
Allow the stripper to sit on the surface for the time specified by the manufacturer, usually between 15 minutes to several hours. During this period, the paint will begin to bubble and lift from the metal.
5. Scrape Off the Paint
- Test a Small Area: Check a small section to see if the paint has softened enough for removal.
- Use a Scraper: Starting at one edge, use a scraper to gently lift and remove the loosened paint. Use metal scrapers for flat surfaces and plastic scrapers for more delicate or curved areas.
- Dispose of Paint and Stripper: Collect the removed paint and stripper residue in a container for proper disposal according to local regulations.
6. Repeat if Necessary
For thick or multiple layers of paint, you may need to reapply the stripper and repeat the process. Ensure the surface is adequately cleaned before each application.
7. Clean the Metal Surface
- Wipe Down: Use a cleaning rag to wipe off any remaining stripper residue from the metal surface.
- Wash with Detergent: Mix a solution of mild detergent and water and use it to thoroughly wash the metal. This step neutralizes any remaining stripper and ensures the surface is clean.
- Rinse and Dry: Rinse the metal with clean water and dry it completely with a clean cloth.
8. Inspect and Finish
- Inspect the Surface: Check the metal for any remaining paint or residue. Repeat the stripping process on any stubborn areas if necessary.
- Final Touches: Once the surface is clean and dry, it’s ready for any further restoration or repainting projects you have planned.
By following these detailed steps, you can effectively and safely remove paint from metal objects using chemical paint strippers. Always follow the specific instructions provided by the stripper manufacturer and take appropriate safety precautions to protect yourself and your surroundings.
Common Mistakes to Avoid

Removing paint from metal objects can be a straightforward process if done correctly. However, there are several common mistakes that can complicate the task or even damage the metal. Here are some key mistakes to avoid:
Skipping the Safety Gear
- Not Wearing Protective Gear: Failing to wear gloves, goggles, and a mask can expose you to harmful chemicals and paint fumes. Always use appropriate protective gear to safeguard your skin, eyes, and respiratory system.
- Ignoring Ventilation: Using chemical strippers in poorly ventilated areas can lead to the buildup of toxic fumes. Ensure adequate ventilation by working outdoors or in a well-ventilated space.
Inadequate Preparation
- Not Gathering All Supplies First: Starting the paint removal process without having all the necessary supplies on hand can lead to interruptions and inefficiencies. Prepare everything you need before you begin.
- Skipping the Test Patch: Failing to test the stripper or removal method on a small, inconspicuous area first can result in unexpected damage to the metal or ineffective paint removal.
Improper Application of Paint Stripper
- Applying Too Thin a Coat: A thin layer of paint stripper might not penetrate all layers of paint, making the removal process more difficult. Apply a thick, even coat for best results.
- Leaving Stripper on Too Long or Too Short: Not following the manufacturer’s instructions regarding how long to leave the stripper on can either result in the paint not coming off easily or the stripper drying out and becoming ineffective.
Using the Wrong Tools
- Using the Wrong Scrapers: Metal scrapers can scratch or damage the surface of delicate metals. Use plastic scrapers for softer metals and detailed areas.
- Over-scraping: Applying too much pressure with scrapers can damage the metal. Be gentle and let the stripper do most of the work.
Ineffective Cleanup
- Not Removing All Residue: Failing to thoroughly clean off all paint and stripper residue can prevent new paint from adhering properly and may leave the surface feeling sticky.
- Skipping Neutralization: Not washing the metal with a detergent solution after stripping can leave behind stripper chemicals that can corrode the metal or interfere with subsequent painting.
Overlooking Reapplication Needs
- Expecting Complete Removal in One Go: Thick or multiple layers of paint often require more than one application of stripper. Be patient and ready to repeat the process if necessary.
- Not Allowing for Drying Time: After cleaning and rinsing the metal, ensure it is completely dry before applying any new paint or finish to avoid issues with adhesion.
By avoiding these common mistakes, you can ensure a smoother, more effective paint removal process. Proper preparation, careful application, and thorough cleanup are key to achieving the best results while preserving the integrity of your metal objects.
Conclusion
Removing paint from metal objects requires careful preparation and the right techniques. By avoiding common mistakes and following proper procedures, you can restore your metal items effectively. For professional help, contact Custom Painting, Inc. at 925-294-8062 or complete our contact form for expert assistance.