

 If you’re planning to have your home painted soon, you will want nothing but a smooth and precise finish, including getting clean lines. The best painting contractors near me have the experience of using painter’s tape for trim or walls that need a crisp and clean paint line. These professionals don’t use regular household tape (like a masking tape) – they use a real painter’s tape to get the job done.
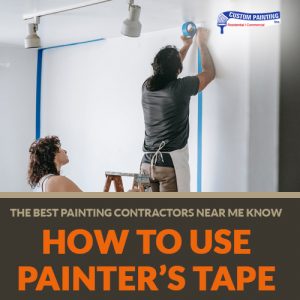
Generally, a blue painter’s tape is regarded as the standard when protecting the parts of the house that you don’t want to paint or when creating patterns and designs.
Therefore, knowing how to use a painter’s tape correctly is essential to get the right finish without making a mess. To make things easier, here’s a guide below to the correct way of using a painter’s tape:
1) Clean the surface
Before applying the painter’s tape, it’s important to clean the surface first. Remove all dust, dirt, oil, grease, grime, etc., that’s stuck on the surface. When the surface is not clean, the painter’s tape won’t stick, and you will keep replacing it, which slows the work down and wastes time and effort.
Greasy and grimy residues will require additional cleaning. Rinse the surface well and let it completely dry before proceeding to the next step.
2) Apply the tape
Once the surface is clean, you can begin to apply the painter’s tape.
While taping by hand isn’t complicated, you can make the process easier by using a painter’s tape applicator. Invest in a good-quality painter’s tape applicator, which you can easily find at a paint store or a home improvement shop. The paint applicator will allow you to apply the tape faster and in more precise lengths. Load the painter’s tape to the applicator and roll the tape along the surface like you want to apply it. There’s no need to look for a pair of scissors as the painter’s tape applicator already comes with a cutter, which you will use to cut the tape after you’ve reached your desired length.
3) Make sure the painter’s tape sticks to the surface
Once you’ve applied the painter’s tape, apply pressure on it. This step is crucial — you want to make sure that no wrinkles or bubbles are present. Otherwise, they might prevent a clean and straight line from being formed. If you don’t press down the tape, the paint will seep under it, making a mess along the way. And you don’t want that.
You may use your fingers or a putty knife to press the tape down and smoothen it along the edges.
After applying the tape, it’s time to paint!
4) After the paint is applied, wait for it to dry completely before removing the tape
As you should know, you can’t remove the tape while the paint is still wet. You have to wait for the paint to dry. Once the paint is dry to the touch, you may now remove the painter’s tape. When removing the painter’s tape from the wall, you have to be careful. Score the tape first with its end, then gently peel it off. That way, the tape will come off nicely without affecting the paint job. Continue until you have removed all the tape from the area.
These are the basic steps to apply the painter’s tape and adequately remove it after the painting job is done.
The best painting contractors near me will guide you through the correct steps of taping walls, baseboards, trims, etc. Or, better yet, you may want to hire them to do the work for you. Professionals guarantee the results you desire and, at the same time, save you from the unwanted hassles involved in the paint job.